
Avid Media Composer is a professional video editing system developed by Avid Technology, widely used in film and television production for its robust editing capabilities and collaborative features.
Overview of Avid Media Composer
Avid Media Composer is a professional video editing system developed by Avid Technology, widely used in film, TV, and media production. While it can be challenging to learn, proper project setup simplifies the editing process. Resources like the 101 tutorial series and a comprehensive 1470-page Editing Guide are available for mastering the software. With strong community support, including forums like the VideoEditing subreddit, users can share knowledge and improve their skills. Its advanced collaboration features make it ideal for team-based projects, ensuring seamless workflows and high-quality output.
Importance of Learning Avid for Video Editing
Mastering Avid Media Composer is essential for aspiring video editors, as it remains the industry standard in film and television production. Its robust tools and collaborative features are highly valued in professional environments. Learning Avid opens doors to career advancement, particularly for those aiming to transition from assistant roles to editor positions. With resources like the 101 tutorial series and active community support, overcoming the learning curve becomes manageable. Proficiency in Avid enhances your versatility and competitiveness in the competitive world of post-production.

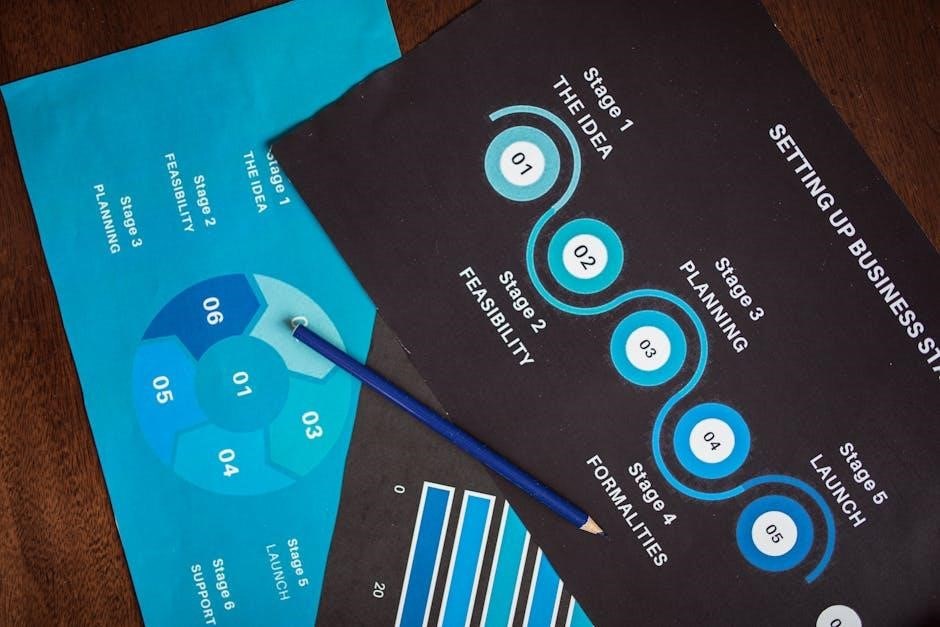
Step 1: Setting Up Your Project
Starting a project in Avid Media Composer begins with setting up your workspace and configuring project parameters to ensure a smooth editing process from the start.
Creating a New Project in Avid
Starting a new project in Avid Media Composer involves launching the application, selecting a project type, and configuring essential settings. Enter a project name, choose resolution and frame rate, and specify storage locations. Proper setup ensures compatibility with your source footage and streamlines the editing process. Organizing your files and settings early on saves time and reduces errors. This step is crucial for a smooth workflow, allowing you to focus on creative editing rather than technical issues.
Setting Up Project Parameters
Configuring project parameters in Avid Media Composer ensures optimal performance and compatibility. Set resolution, frame rate, and aspect ratio to match your source footage. Choose a project format like HD or 4K and select appropriate color spaces. Designate storage locations for media and render files. Audio settings, such as sample rate and bit depth, should align with your workflow. Proper parameter setup prevents errors and ensures smooth playback. Always verify settings before importing media to avoid rework. This step is essential for maintaining consistency and quality throughout your project.

Step 2: Ingesting Your Media
Importing and organizing your footage is crucial. Use Avid’s import tools to bring in media, ensuring files are properly named and stored for easy access during editing.
Importing Footage into Avid
Importing footage into Avid Media Composer is a straightforward process that ensures your media is ready for editing. Start by selecting File > Import from the menu bar. Choose the desired files or folders, and Avid will automatically recognize and categorize them. You can also drag-and-drop media directly into the Browser window for quick ingestion. Make sure your files are properly named and organized to streamline the editing workflow. Avid supports various file formats, but it’s important to verify compatibility before importing. Once imported, your media will be accessible in the Browser, ready for use in your project.
Organizing Media in the Browser
Organizing media in the Browser is essential for efficient editing. Create folders and bins to categorize clips, such as video, audio, and graphics. Use clear, descriptive names for easy navigation. Drag-and-drop clips into bins to group related media. You can also add metadata to clips for better searchability. Use the search tool to quickly locate specific clips. Keeping your media organized saves time and ensures a smoother workflow. A well-organized Browser helps you focus on storytelling rather than searching for assets.

Step 3: Basic Editing Techniques
Mastering basic editing techniques is foundational. Learn to assemble clips and trim footage to create a cohesive narrative. Essential skills for any editor.
Adding Clips to the Timeline
Adding clips to the timeline is a core step in video editing. In Avid Media Composer, you can drag and drop clips directly from the browser to the timeline. Clips can be added to the beginning, end, or middle of the timeline by positioning the cursor where you want the clip to appear. You can also use the spindle to mark clips and automatically add them to the timeline. This process allows you to build your sequence and create a cohesive narrative. Proper placement ensures a smooth workflow and precise control over your edit.
Trimming Clips in the Timeline
Trimming clips in the timeline is essential for refining your edit. In Avid Media Composer, you can enter trim mode by pressing F or using the trim tool. This allows you to adjust the start or end of a clip by dragging its edges. The slip and slide tools enable precise adjustments without affecting the timeline’s overall length. Use ripple trims to adjust a clip while maintaining the project’s duration. Trimming ensures your clips are perfectly aligned, enhancing the pacing and flow of your sequence.

Step 4: Working with the Timeline
Mastering the timeline is central to editing in Avid. Understand its structure, navigate clips, and use tools to refine your sequence efficiently.
Understanding the Timeline Structure
In Avid Media Composer, the timeline is where you assemble your video and audio clips into a cohesive sequence. It is divided into video tracks (V1, V2, etc.) and audio tracks (A1, A2, etc.), with the video tracks located above the audio tracks. Each track can hold multiple clips, and you can add or remove tracks as needed. The timeline allows you to arrange clips in a specific order, enabling precise control over your edit. Understanding this structure is essential for effective editing and achieving your creative vision.
Navigating and Selecting Clips
Navigating the timeline in Avid Media Composer involves using tools like the mouse or keyboard shortcuts to move through your project. To select clips, simply click on them. For precise adjustments, use the Slip (S) and Slide (B) tools to reposition or adjust clip lengths. Use the Zoom (Z) tool to focus on specific areas. Keyboard shortcuts like L for loop playback simplify navigation. Selected clips are highlighted, and their handles appear in yellow and blue for trimming. Mastering these techniques ensures efficient editing and precise control over your sequence.

Step 5: Advanced Editing Techniques
Master advanced editing techniques to enhance your storytelling. Learn multi-camera workflows, J-cuts, and L-cuts to create seamless transitions and dynamic pacing in your sequences.
Multi-Camera Editing in Avid
Multi-camera editing in Avid allows you to work with footage from multiple cameras synced by timecode or in/out points. This feature is ideal for interviews, concerts, or scenes shot with several angles. To access multi-camera editing, select the clips in the bin, right-click, and choose Multi-Camera > Sync. A new multi-camera clip is created, enabling seamless switching between angles in the timeline. This workflow streamlines editing, ensuring a polished and professional final product while maintaining visual continuity and dynamic pacing in your sequences.
Using J-Cuts and L-Cuts
J-cuts and L-cuts are essential techniques for creating smooth transitions between clips. A J-cut involves bringing the audio of the next clip in before the video cuts, while an L-cut extends the video of the current clip beyond the audio cut. In Avid, these can be achieved by slipping clips or using the Source and Record monitors. These methods enhance storytelling by maintaining visual or audio continuity, ensuring a seamless flow during transitions and keeping the audience engaged with the narrative or emotional tone of the sequence.
Step 6: Adding Transitions and Effects
Enhance your edit with transitions and effects to create polished visuals. Use dissolve, fade, or slide transitions between clips for smooth scene changes. Apply effects from the Effect Palette to add depth or correct elements. Experiment with motion effects, color corrections, or text overlays to elevate your narrative and maintain viewer engagement throughout the sequence.
Applying Transitions Between Clips
In Avid Media Composer, transitions are applied to smooth out cuts between clips. Open the Effect Palette to browse available transitions like dissolve, fade, or slide. Drag and drop a transition onto the cut point in the timeline. Adjust the duration by dragging the edge or using the Effect Mode window. Preview the transition in the Preview Monitor to ensure it matches your desired style. Use transitions sparingly to maintain pacing and focus, ensuring they enhance the narrative without distracting the audience.
Using Effects in the Effect Palette
Avid’s Effect Palette offers a wide range of effects to enhance your edit. Browse categories like Color Correction, Blur, and Text. Drag and drop an effect onto a clip or the timeline to apply it. Use the Effect Mode to adjust parameters and keyframe animations. Effects can be layered for complex looks. Render effects to preview smoothly. Experiment with presets or create custom effects to achieve your vision, ensuring they align with your project’s aesthetic and storytelling goals.

Step 7: Audio Editing Basics
Avid’s audio tools enable precise sound control. Adjust levels, sync audio with video, and use rubber-banding for automation. The Audio Suite offers advanced editing features for clear, balanced sound.
Adjusting Audio Levels
Adjusting audio levels is crucial for ensuring clear and balanced sound. In Avid, use the Audio Meter to monitor levels in real-time. To adjust levels, select clips in the timeline and use the Audio Gain tool to increase or decrease volume. You can also use the rubber-banding feature to automate level changes over time. For precise control, access the Audio Suite tools, which allow you to normalize levels, reduce noise, and fine-tune your mix. Proper level adjustment enhances the overall audio quality and ensures a professional-sounding edit.
Syncing Audio with Video
Syncing audio with video ensures that sound and visuals align perfectly. In Avid, you can automatically sync clips by using timecode or ingest settings. If timecode isn’t available, manually sync by marking in and out points in the Source and Record monitors. Use the Slip and Slide tools to fine-tune sync without moving clips. For multicam setups, Avid’s AutoSync feature streamlines syncing across multiple angles. Proper syncing is vital for maintaining a seamless and professional edit.

Step 8: Color Correction and Grading
Enhance your project’s visual appeal by adjusting color balance and contrast. Use Avid’s Color Palette for precise corrections and LUTs for consistent grading, ensuring a polished look.
Using the Color Palette
Avid’s Color Palette offers powerful tools for precise color correction. Adjust brightness, contrast, and color balance to enhance your footage. Use the wheels and curves for fine-tuned adjustments. The real-time preview allows you to see changes instantly. Access advanced features like hue vs. hue and luma vs. chroma for detailed corrections. Save time with keyboard shortcuts for quick adjustments. Apply consistent looks across clips by saving settings as presets. This tool is essential for achieving professional-grade color correction and maintaining visual coherence in your project. Mastering the Color Palette elevates your editing to the next level.
Applying LUTs for Color Grading
LUTs (Look-Up Tables) are files that transform color and contrast to achieve specific visual styles. In Avid, you can import LUTs into the Color Palette to apply consistent looks across your project. Use the Effect Palette to add LUTs to clips or entire sequences. This ensures a uniform aesthetic, whether matching footage to a camera’s profile or creating a cinematic feel. Experiment with different LUTs to enhance mood and visual storytelling. Avid’s LUT support streamlines color grading, saving time while delivering professional results. This feature is invaluable for maintaining creative consistency in your edits.

Step 9: Collaboration and Sharing
Avid’s collaboration tools enable seamless teamwork, allowing editors to share projects and media efficiently. Features like shared storage and version control facilitate organized workflows and effective communication among team members.
Exporting Your Project
In Avid Media Composer, exporting your project is a straightforward process that ensures your final edit is delivered in the desired format. To export, navigate to File > Export and select the appropriate settings. Choose from formats like HD, 4K, or custom resolutions. You can also specify codecs, bitrate, and frame rate. Ensure the destination folder is selected and optionally add metadata. Once configured, click Export to begin rendering. Avid provides preview options to verify quality before finalizing the output, ensuring your project meets professional standards.
Sharing Media with Team Members
Avid Media Composer simplifies collaboration by enabling easy sharing of media and projects with team members. Use MediaCentral to share assets securely across your network. You can export specific clips or entire projects in standardized formats for seamless access. Sharing media via cloud storage or shared drives is also supported, ensuring team members can access files from any location. Avid’s collaborative tools allow real-time feedback and version control, enhancing productivity and ensuring everyone stays aligned throughout the post-production process.
Step 10: Final Review and Export
In the final step, review your project for accuracy and consistency. Export your work using Avid’s optimized settings and recommended formats for delivery.
Reviewing Your Final Edit
Once your project is complete, conduct a thorough review of your final edit. Check the timeline for continuity, ensuring clips flow smoothly and align with your creative vision. Verify that all transitions, effects, and audio levels are polished and meet your standards. Pay attention to pacing, making sure the narrative or message is clear and engaging. Use playback controls to review sections in real-time, and loop problem areas for precise adjustments. This step ensures your project is cohesive, professional, and ready for final export.
Exporting the Final Project
Exporting your final project in Avid Media Composer is the last step before sharing your work. Select the desired file format, resolution, and codec based on your delivery requirements. Common formats include MP4, MOV, and DNxHD. Choose the appropriate preset for platforms like YouTube, Vimeo, or Blu-ray. Ensure metadata is included for organization. Render the project in proxy or high-resolution, depending on your needs. Designate a destination folder and confirm the file name. Avid will process the export, showing a progress bar. Once complete, review the exported file to ensure accuracy and quality before sharing.
Mastering Avid Media Composer through these 10 steps enables you to create professional video content. This guide covers essentials from setup to export, ensuring polished results. Regular practice will refine your skills and unlock your full creative potential.
This 10-step tutorial provides a comprehensive guide to mastering Avid Media Composer. Starting with project setup and media ingestion, it progresses through basic and advanced editing techniques, transitions, audio adjustments, color correction, and collaboration tools. Each step builds on the previous one, ensuring a smooth learning curve. The process culminates in final review and export, equipping users with the skills to deliver high-quality video projects. By following these steps, editors can efficiently navigate Avid’s interface and produce professional-grade content with confidence.
Next Steps for Mastering Avid Media Composer
After completing the 10-step tutorial, focus on refining your skills through hands-on practice and exploring advanced features like ScriptSync, PhraseFind, and multi-camera editing. Experiment with complex workflows, such as integrating with Pro Tools for advanced audio post-production. Join Avid user communities and attend webinars to stay updated on new features. Consider pursuing Avid certification to validate your expertise. Collaborate on real-world projects to apply your knowledge and adapt to diverse editing styles. Continuous learning and practice are key to mastering Avid Media Composer and staying competitive in the industry.