Smart Bird Feeder Instructions: A Comprehensive Guide
Welcome! This guide provides step-by-step instructions for setting up your smart bird feeder. We will cover everything from assembly to connecting to the app. Get ready to enjoy birdwatching!
What’s Included in the Box
Before you begin assembling your smart bird feeder, it’s important to verify that all components are present. Inside the box, you should find the main bird seed container, which houses the camera and smart technology. Also included is the feeder base, providing a stable foundation for your feeder. The feeder cover, designed to protect the bird seed from the elements, should also be present.
You’ll find an antenna, essential for establishing a reliable Wi-Fi connection. A Type-C cable and adapter are provided for charging the device, and some models include a solar panel for outdoor charging. Check for the mounting hardware, allowing you to securely install the feeder in your desired location. Finally, ensure you have the instruction manual for detailed guidance.
Assembling the Smart Bird Feeder
Now, let’s begin assembling your smart bird feeder. Start by attaching the base to the main bird seed container. Ensure it’s securely fastened for stability. Next, proceed to install the feeder cover. Align the cover with the container and press down until it clicks into place. This will protect the bird seed from rain and sun.
The final step in the assembly process involves attaching the antenna; Locate the hole on the back of the bird seed container and carefully insert the antenna. Twist it tightly to ensure a secure connection. A properly connected antenna is crucial for a stable Wi-Fi connection, enabling seamless app connectivity and functionality. Double-check all connections to ensure the unit is ready for setup.
Base Assembly
The base assembly is a critical first step in setting up your smart bird feeder. To begin, locate the base component within the packaging. Carefully align the base with the bottom of the bird seed container. Ensure the base is oriented correctly, paying attention to any specific alignment marks or guides provided.
Once aligned, firmly press the base onto the container. You should hear or feel a click indicating that the base is securely attached. A stable base is essential to prevent the feeder from tipping over, especially when filled with bird seed or exposed to wind. Double-check the connection by gently wiggling the base to ensure it is firmly in place and ready to support the rest of the structure.
Feeder Cover Installation
The feeder cover protects the bird seed from rain and other elements, so its proper installation is crucial. First, identify the feeder cover component among the parts included in the box. Align the cover with the top of the bird seed container. Look for specific grooves or markings that indicate the correct orientation.
Gently place the cover on top of the container, ensuring it sits flush. You may need to apply slight pressure to snap it into place. Some models have locking mechanisms that require a twist or a click to secure the cover. Make sure the cover is firmly attached to prevent birds from easily dislodging it. A secure cover keeps the seed dry and fresh, attracting more birds to your smart feeder. Always check for stability after installation.
Antenna Attachment
Attaching the antenna is a critical step for ensuring your smart bird feeder can connect to your WiFi network. Locate the antenna included in the box. Identify the antenna port on the bird seed container, usually found on the back. Carefully align the antenna with the port and gently screw it in.
Avoid over-tightening, as this can damage the antenna or the port. Ensure the antenna is securely fastened to maintain a stable connection. A loose antenna can result in intermittent connectivity, preventing you from receiving real-time notifications and videos. If the antenna is disconnected, the app might not connect to the feeder. Double-check the connection to optimize performance. An optimally placed antenna ensures a strong signal.
Setting Up the Bird Lover App
To fully utilize your smart bird feeder, you’ll need to set up the Bird Lover app on your smartphone or tablet. Begin by downloading the app from either the Google Play Store (for Android devices) or the Apple App Store (for iOS devices). Search for “Bird Lover” or scan the QR code found in the instruction manual to quickly locate the correct app.
Once downloaded, open the app and follow the on-screen instructions to create an account. You may need to provide an email address and create a secure password. After creating your account, log in and prepare to pair the app with your bird feeder. The app will guide you through connecting to your device, ensuring seamless integration. This setup is crucial for accessing live streams, receiving notifications, and enjoying all the smart features.
Connecting to WiFi
Establishing a stable WiFi connection is essential for your smart bird feeder to function correctly. This connection allows the feeder to transmit real-time video and data to your Bird Lover app, enabling you to observe and identify birds remotely. Begin by ensuring your bird feeder is within range of your WiFi router. A strong signal is crucial for uninterrupted streaming.
Next, open the Bird Lover app and navigate to the device settings. Select the option to connect to WiFi and follow the prompts to enter your network credentials. Make sure you enter the correct WiFi password to avoid connection issues. The bird feeder will attempt to connect to your WiFi network, and a successful connection will be indicated within the app. If you encounter any problems, double-check your password and the proximity of the feeder to the router.
2.4GHz WiFi Requirement
Your smart bird feeder requires a 2.4GHz WiFi network to operate effectively. This is a common frequency band supported by most routers. However, it’s essential to understand why this requirement exists and how to ensure compatibility. The 2.4GHz band offers a longer range compared to the 5GHz band, which is crucial for outdoor devices like bird feeders that may be located further from the router.
Many modern routers are dual-band, meaning they broadcast both 2.4GHz and 5GHz networks; When connecting your bird feeder, ensure you select the 2.4GHz network from the list of available networks in the Bird Lover app. If you’re unsure whether your router supports 2.4GHz or how to switch between bands, consult your router’s manual or contact your internet service provider for assistance. Connecting to the 5GHz network will prevent the feeder from functioning correctly.
Mounting and Installation
Proper mounting is crucial for the stability and optimal performance of your smart bird feeder. Before you begin, choose a location that offers a clear view for the camera and is easily accessible for refilling. Consider factors like sunlight exposure and proximity to trees that could obstruct the view or provide access for squirrels. The mounting location should also be within range of your 2.4GHz WiFi network.
Most smart bird feeders come with mounting hardware, such as brackets or straps. Follow the instructions specific to your model to securely attach the feeder to a tree, pole, or other suitable surface. Ensure the feeder is level to prevent seed spillage and maintain camera alignment. Regularly check the mounting hardware for wear and tear and tighten as needed to prevent the feeder from falling. A stable and well-positioned feeder will provide the best birdwatching experience.
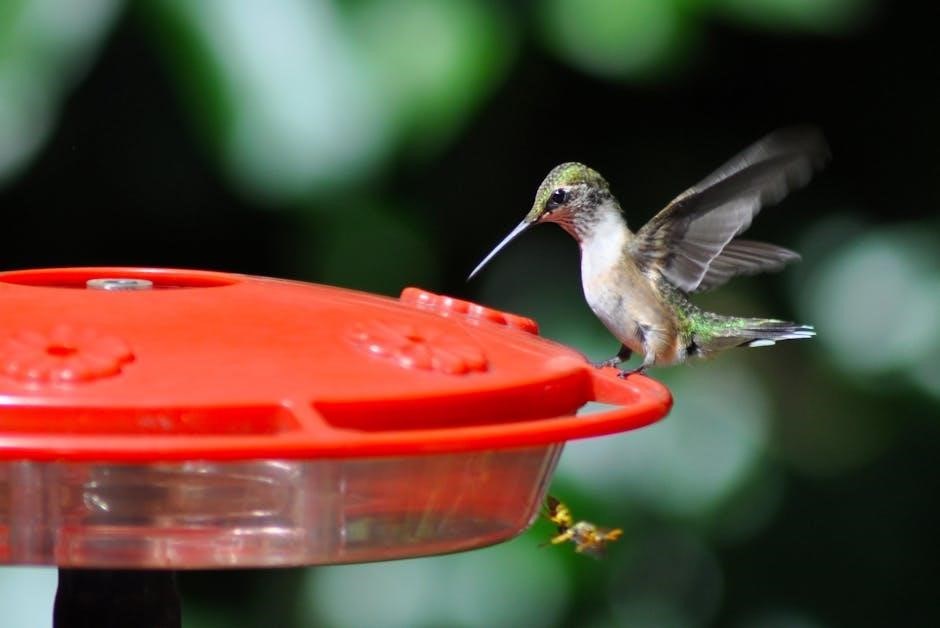
Adding Bird Seed
Once your smart bird feeder is securely mounted, it’s time to attract some feathered friends by adding bird seed. The type of seed you choose can significantly impact the variety of birds that visit your feeder. Sunflower seeds, for instance, are a popular choice that attracts a wide range of species. Other options include nyjer seed for finches, millet for ground-feeding birds, and suet for insect-eating birds.

To add bird seed, locate the designated seed container, usually accessible by removing the feeder cover. Fill the container to the recommended level, avoiding overfilling, which can cause spillage and attract unwanted pests. Regularly check the seed level and replenish as needed. Clean the feeder periodically to prevent mold and bacteria buildup, ensuring a healthy environment for your avian visitors. Consider mixing different types of seeds to cater to a broader range of bird preferences and create a vibrant birdwatching experience.
Charging the Feeder
To ensure your smart bird feeder operates optimally, regular charging is essential. The device typically features a rechargeable battery that powers the camera and other smart functions. Locate the charging port on the feeder, which is usually a Type-C port situated on the back of the seed container. Use the provided Type-C cable to connect the feeder to a power source.
A 5V/1.5A charging adapter is recommended for efficient charging. Simply plug the adapter into a standard electrical outlet and connect the cable. Charging time may vary, but it’s best to allow the feeder to charge fully before use. For outdoor charging, some models include a solar panel. Connect the solar panel to the charging port to harness solar energy. Ensure the panel is positioned in direct sunlight for maximum efficiency. Regularly monitor the battery level in the app to avoid unexpected downtime and maintain continuous birdwatching fun.
Type-C Cable and Adapter
Your smart bird feeder comes equipped with a Type-C cable for convenient and efficient charging. Locate the Type-C charging port, usually positioned on the rear of the bird seed container. Use the provided cable to connect the feeder to a power adapter. It is recommended to use a 5V/1.5A adapter for optimal charging performance. Plugging the feeder into an adapter with a lower amperage may result in slower charging times, while using a higher amperage adapter is generally not recommended as it could potentially damage the battery.
Ensure the cable is securely connected to both the feeder and the adapter. During the charging process, monitor the status light indicator on the feeder to track the charging progress. A full charge will ensure uninterrupted operation of your bird feeder, allowing you to enjoy continuous monitoring and recording of your feathered visitors. Always use the provided cable and a compatible adapter to maintain the longevity and safety of your smart bird feeder.
Solar Panel Charging
For eco-friendly and convenient charging, your smart bird feeder is also equipped with solar panel charging capabilities; The solar panel can be directly connected to the charging port located on the back of the bird seed container, typically the same port used for the Type-C cable. Position the solar panel in a location that receives ample sunlight throughout the day to maximize charging efficiency. The amount of charge generated will depend on the intensity and duration of sunlight exposure.
Ensure the solar panel is securely connected to the feeder. Monitor the status light indicators to track the charging progress. Solar panel charging provides a sustainable way to keep your bird feeder powered, reducing the need for frequent manual charging. Keep the solar panel clean from any debris or obstructions to ensure optimal performance. This feature makes your bird feeder environmentally friendly and low maintenance.
Sharing Device Access
To allow family and friends to enjoy the smart bird feeder experience, you can easily share device access through the Bird Lover app. The initial setup account has full administrative privileges, including the ability to share and configure device settings. Other invited members, however, may have restricted access, such as viewing live streams or accessing recorded footage, but not altering settings.
To share access, navigate to the device settings within the app and select the “Share Device” option. You’ll typically need to enter the email addresses or usernames of the individuals you wish to grant access to. The recipients will receive an invitation to create their own accounts and link to your bird feeder. Remember to review and manage shared access regularly to ensure privacy and security. Sharing access allows multiple users to enjoy the delightful experience of observing and identifying birds visiting your feeder.
Understanding Status Light Indicators
The smart bird feeder features an LED status light that communicates crucial information about its operational state. A solid blue light often indicates that the device is successfully connected to your Wi-Fi network and functioning correctly. A flashing blue light typically signals that the feeder is attempting to connect to Wi-Fi or is in pairing mode.
A red light might indicate a problem, such as a low battery, a connection error, or a malfunction. Refer to the user manual for specific red light error codes. A green light could mean the feeder is fully charged or that data is being transferred. Some feeders use different color schemes, so always consult your model’s manual. Understanding these light indicators is crucial for troubleshooting and maintaining optimal performance. Regularly check the status light to promptly address any issues and ensure uninterrupted bird-watching enjoyment.