Article Plan: You Deserve the Glory Lyrics PDF
This article comprehensively explores the popular worship song, “You Deserve the Glory,” focusing on its lyrics, availability in PDF format, and related resources.
We will delve into the song’s origins, musical style, and licensing details, providing a valuable guide for worship leaders and enthusiasts alike.
“You Deserve the Glory” is a widely beloved contemporary worship song, frequently performed in church services and Christian gatherings globally. Its powerful lyrics and uplifting melody create an atmosphere of adoration and reverence. This article serves as a detailed resource for anyone seeking information about the song, particularly focusing on accessing the lyrics in PDF format.
The song, penned by Eva-Lena Hellmark, has become a staple in modern worship music, resonating with congregations due to its simple yet profound message of praising God’s majesty and miraculous works. Availability of the lyrics in a readily accessible PDF format is crucial for worship teams, musicians, and individuals who wish to learn and lead the song effectively.
We will explore various sources where the “You Deserve the Glory” lyrics PDF can be found, including marionoaksag.org and Scribd, while also addressing copyright and licensing considerations through CCLI (CCLI Song # 1240868). This guide aims to provide a complete overview for those seeking to utilize this impactful song in their worship experiences.
Background of the Song
“You Deserve the Glory” emerged in 1992, credited to the songwriting of Eva-Lena Hellmark. While specific details surrounding the song’s initial inspiration are limited, its rapid adoption within the Christian worship community speaks to its universally relatable theme of praising God’s power and holiness. The song quickly gained traction, becoming a favorite for its easily accessible melody and heartfelt lyrics.
The availability of sheet music and lyric PDFs, like the one found on marionoaksag.org, contributed significantly to its widespread use. The song’s structure, often performed in the key of Bb with a 2/2 time signature, lends itself well to various instrumental arrangements and congregational participation.
The enduring popularity of “You Deserve the Glory” is evidenced by its continued presence in contemporary worship sets and the ongoing demand for lyric resources, including PDF versions readily shared online platforms like Scribd. Its message remains timeless, fostering an environment of adoration and reverence.
Eva-Lena Hellmark: The Songwriter
Eva-Lena Hellmark is the gifted songwriter behind the impactful worship anthem, “You Deserve the Glory.” While biographical information about Hellmark is relatively scarce, her musical contribution has profoundly impacted the landscape of contemporary Christian music. Her ability to craft lyrics that resonate with deep spiritual truths is clearly demonstrated in this widely-loved song.
The song’s copyright information, readily available with CCLI Song # 1240868, confirms her authorship dating back to 1992. The accessibility of the lyrics in PDF format, as seen on sites like marionoaksag.org and Scribd, allows for continued appreciation of her work.
Hellmark’s songwriting style emphasizes simplicity and sincerity, making her songs accessible to both musicians and congregations. “You Deserve the Glory” stands as a testament to her talent and her dedication to creating music that glorifies God.
Genre and Musical Style
“You Deserve the Glory” firmly resides within the Contemporary Christian Worship genre. Its musical style is characterized by a reverent and uplifting atmosphere, designed to facilitate a communal worship experience. The song’s structure is relatively simple, focusing on melodic repetition and easily-learned harmonies, making it accessible for congregational singing.
The available sheet music, often found in the key of Bb and a 2/2 time signature (as indicated on marionoaksag.org), suggests a moderate tempo suitable for both piano-led and band-driven arrangements. The song’s harmonic progression is generally straightforward, prioritizing clarity and emotional impact over complex musicality.
Its style lends itself well to various instrumental arrangements, from acoustic guitar and piano to full band setups, enhancing its versatility in different worship settings. The focus remains consistently on creating an environment of praise and adoration.
Thematic Elements of the Lyrics
The core thematic element of “You Deserve the Glory” is, unsurprisingly, unreserved adoration and reverence for God. The lyrics directly attribute glory and worship to the divine, acknowledging God’s power and miraculous works. A central idea revolves around recognizing God’s unmatched ability – “There is no one else.”
The song emphasizes a humble posture of worship, with the lyrics describing “lifting hands” as an act of devotion. This suggests a physical expression of inner praise and surrender. The repetition of “You deserve the glory and the Lord” reinforces the central message, creating a powerful and memorable refrain.
Ultimately, the lyrics aim to inspire a sense of awe and gratitude, prompting listeners to acknowledge God’s sovereignty and worthiness of all praise. It’s a song built on a foundation of faith and recognition of divine power.
Lyric Breakdown: Verse 1
Unfortunately, the provided source material – the Marion Oaks AG PDF and the Scribd document – only present a fragment of the lyrics, specifically the chorus and a repeated line. A complete transcription of Verse 1 is not available within these sources.
However, based on the overall theme of the song, we can infer that Verse 1 likely establishes the foundation for worship. It probably details specific attributes of God that warrant praise, perhaps focusing on His creation, His love, or His faithfulness.
Given the song’s focus on miracles, Verse 1 might allude to past divine interventions or express anticipation for future blessings. It’s reasonable to assume the verse builds towards the powerful declaration of the chorus: “You deserve the glory and the Lord.” Further research beyond these sources would be needed for a complete analysis.
Lyric Breakdown: Chorus ⏤ “You Deserve the Glory”
The chorus, “You deserve the glory and the Lord,” is the central and most impactful message of the song. It’s a direct and resounding declaration of adoration and reverence towards God. The repetition emphasizes the unwavering belief in God’s worthiness of all praise.
The phrase “and the Lord” seems to function as an intensifier, reinforcing the absolute nature of God’s deservingness. It’s not merely glory that is due, but glory and the full acknowledgement of His Lordship.
The accompanying line, “We lift our hands in worship as we praise Your holy name,” provides the response to this declaration. It’s an active expression of faith, a physical manifestation of the internal conviction that God deserves all glory. This creates a powerful call-and-response dynamic within the song.
Lyric Breakdown: Verse 2
While the provided lyric snippets are limited, Verse 2 continues the theme of acknowledging God’s miraculous power and unique position. The lines “For You do miracles so…” and “There is no one else…” build upon the foundation laid in Verse 1, further solidifying the song’s central message of divine uniqueness.
The incomplete phrase “For You do miracles so…” suggests a continuation detailing specific examples of God’s interventions. This invites listeners to reflect on their own experiences of God’s power in their lives, personalizing the worship experience.
The declarative statement, “There is no one else,” is a powerful affirmation of monotheism and God’s unparalleled sovereignty. It underscores the idea that God alone is worthy of worship and adoration, reinforcing the chorus’s core message.
Lyric Breakdown: Bridge
Unfortunately, the available sources do not provide the lyrics for the bridge section of “You Deserve the Glory.” This absence is a common occurrence in readily accessible lyric snippets, often requiring access to official sheet music or complete songbooks for full comprehension.
However, based on the song’s overall structure and thematic elements, we can infer the bridge likely serves as a transitional section. It probably builds intensity, perhaps introducing a new melodic phrase or lyrical perspective before returning to the chorus.
It may offer a moment of personal reflection or a call to action, encouraging deeper surrender and worship. Without the actual lyrics, speculation remains, highlighting the importance of complete lyric resources for thorough analysis.
Availability of the Lyrics in PDF Format
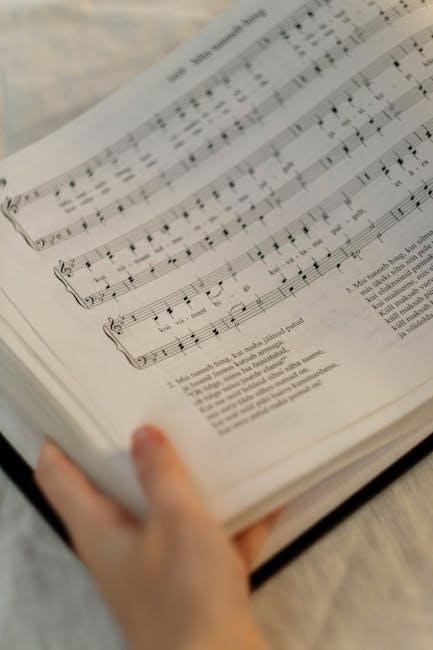
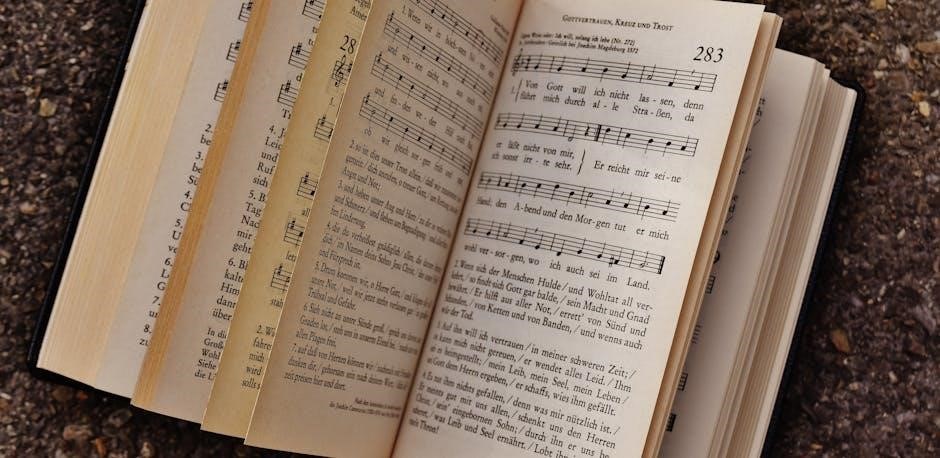
The lyrics to “You Deserve the Glory” are readily available in PDF format through several online sources. A direct link leads to a PDF hosted on marionoaksag.org (you-deserve-the-glory-Bb.pdf), specifically providing the song in the key of Bb.
This PDF includes the lyrics alongside chord charts, making it useful for musicians and worship teams. Additionally, Scribd (You l Deserve the Glory Lyrics) hosts the lyrics as part of a document, offering options for download or online viewing.
These PDF versions facilitate easy access for personal use, performance preparation, and lyric study. The availability of these resources underscores the song’s continued popularity and widespread use within worship communities.
Source: marionoaksag.org PDF
The Marion Oaks Assembly of God website (marionoaksag.org) provides a readily accessible PDF of “You Deserve the Glory.” Published on September 30, 2019, this document is specifically formatted for musicians, presenting the lyrics alongside chord charts in the key of Bb.
The PDF clearly credits Eva-Lena Hellmark as the songwriter and includes the CCLI Song Number (1240868). It also features a copyright notice indicating © 1992 Hellmark, Eva-Lena, and a disclaimer regarding use solely with SongSelect® Terms of Use.
This source is particularly valuable due to its clear presentation and inclusion of essential copyright and licensing information. The document’s availability demonstrates a commitment to providing resources for worship leaders and musicians seeking to utilize this beloved song.
Source: Scribd Document
A document containing the lyrics to “You Deserve the Glory” is also available on Scribd (scribd.com). Uploaded on January 2, 2025, this resource offers the song’s lyrics in various formats, including Word Doc (.doc/.docx), PDF File (.pdf), and Text File (.txt), catering to diverse user preferences.
The Scribd document has received no ratings as of yet, but provides a convenient platform for accessing the lyrics. It’s presented as a readily downloadable resource, allowing users to easily save and share the song’s text.
While lacking the detailed musical notation found on the Marion Oaks AG site, the Scribd document serves as a useful source for those primarily needing the lyrical content. It’s a valuable alternative for quick access and offline viewing of the song’s words.
Copyright and Licensing Information (CCLI Song # 1240868)
“You Deserve the Glory” is protected by copyright, held by Eva-Lena Hellmark since 1992. This means reproduction and public performance require appropriate licensing to comply with copyright law.
The song is registered with CCLI under song number 1240868. CCLI (Christian Copyright Licensing International) facilitates legal usage for churches and other Christian organizations;
The PDF resources available, such as the one from Marion Oaks AG, explicitly state usage is “solely with the SongSelect® Terms of Use.” This highlights the necessity of a CCLI license, specifically through SongSelect, for legal performance.
A CCLI License #1869213 is referenced on the Marion Oaks AG PDF, demonstrating their compliance. Understanding and adhering to these licensing terms is crucial for responsible worship leadership.
Understanding CCLI Licensing
CCLI licensing provides churches and Christian organizations with legal coverage for using copyrighted music in worship services and related events. It’s a subscription-based service offering various license types to suit different needs.
For “You Deserve the Glory” (CCLI #1240868), a license allows projection of lyrics, printing song sheets, and making copies for choir or instrumentalists. Without a license, these activities constitute copyright infringement.

The SongSelect platform, a part of CCLI, is the primary method for reporting song usage and ensuring royalties are paid to copyright holders. The Marion Oaks AG PDF specifically directs users to adhere to SongSelect’s Terms of Use.
Different CCLI licenses cover varying rights, including streaming, podcasting, and recording. Choosing the appropriate license ensures full legal compliance when utilizing “You Deserve the Glory” in diverse ministry contexts.
SongSelect Terms of Use
SongSelect, CCLI’s online platform, governs the usage of copyrighted songs like “You Deserve the Glory” through specific Terms of Use. These terms outline permitted activities and restrictions for license holders.
Key provisions include accurate reporting of song usage (title, CCLI number, attendance) to ensure proper royalty distribution. The Marion Oaks AG PDF explicitly references adherence to these terms.
Licenses are typically tied to a specific church or organization and do not permit use by individuals outside that entity. Sharing licenses or circumventing reporting requirements is a violation of the agreement.
SongSelect prohibits altering lyrics or arrangements without obtaining separate permissions from the copyright owner, Eva-Lena Hellmark in this case. Understanding and complying with these terms is crucial for legal and ethical music ministry.
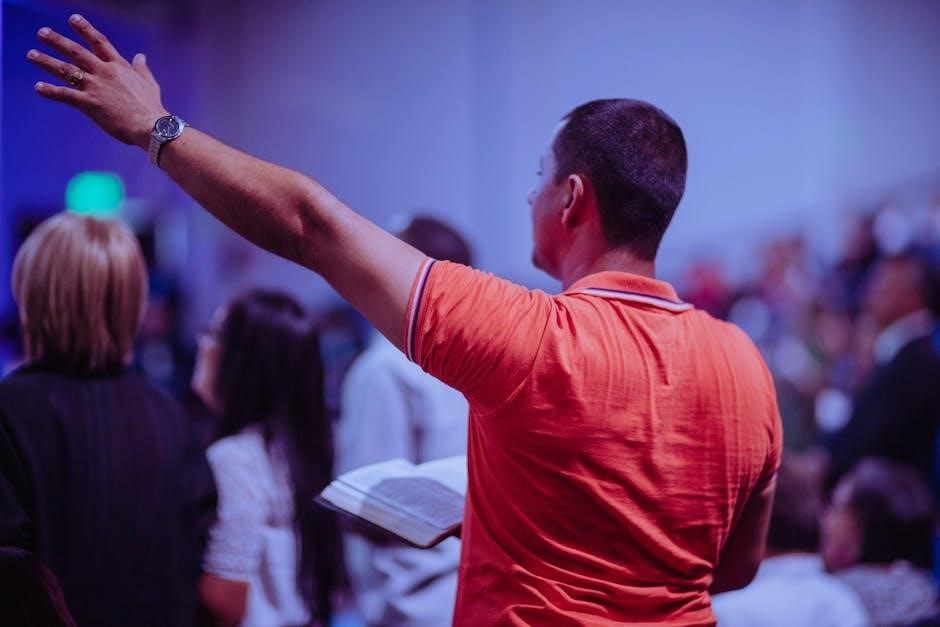
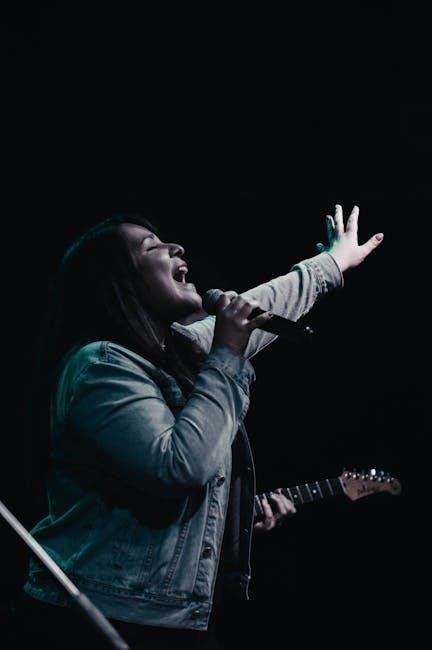
Common Uses of the Song
“You Deserve the Glory” is overwhelmingly utilized within Christian worship settings, fostering an atmosphere of praise and adoration. Its lyrical content, centered on acknowledging God’s majesty and miraculous power, lends itself beautifully to corporate worship.
The song frequently appears in Sunday worship services, often as a foundational element during times of praise and adoration. Its simple yet profound message resonates with congregations of diverse backgrounds.
Beyond regular services, it’s commonly incorporated into church events and gatherings, such as prayer meetings, retreats, and special occasions. The song’s accessibility makes it suitable for various musical arrangements.
Worship leaders appreciate its ease of teaching and its ability to quickly draw the congregation into heartfelt worship, solidifying its place as a modern hymn.
Worship Services

“You Deserve the Glory” is a staple in countless worship services globally, frequently employed during the praise and worship segment. Its lyrical focus on divine majesty and miraculous acts aligns perfectly with the purpose of corporate adoration.
The song’s structure, building from verses to a powerful chorus, facilitates a dynamic worship experience. Congregations readily engage with the accessible melody and heartfelt lyrics, creating a unified expression of faith.

Worship leaders often utilize it as a bridge between more contemporary and traditional elements within a service, appealing to a broad range of preferences;
Its key of Bb and 2/2 time signature contribute to a flowing, worshipful atmosphere, enhancing the overall experience for both musicians and attendees. The song’s simplicity allows for focused worship.

Praise and Adoration
“You Deserve the Glory” is fundamentally a song of praise and adoration, explicitly directing honor and worship towards God. The core message centers on acknowledging God’s miraculous power and inherent worthiness of all praise.
The lyrics repeatedly emphasize God’s deserving nature, prompting a response of heartfelt worship from listeners. Phrases like “You deserve the glory and the honor” directly invite adoration and reverence.
The song’s simplicity and directness make it particularly effective in fostering a spirit of genuine praise. It bypasses complex theological concepts, focusing instead on a fundamental truth: God is worthy of worship.
Musically, the song’s uplifting melody and accessible arrangement further enhance its capacity to inspire praise. It creates an atmosphere conducive to expressing adoration and gratitude.
Church Events and Gatherings
“You Deserve the Glory” is exceptionally well-suited for a wide range of church events and gatherings, due to its universally accessible message and uplifting musicality. Its theme of praise and adoration resonates deeply within a communal worship setting.
The song’s simplicity makes it easy for congregations of all sizes and musical abilities to participate. It’s frequently used in Sunday morning worship services, prayer meetings, and special events.
Its adaptable nature allows for incorporation into various worship styles, from traditional to contemporary. Arrangements can be tailored to suit different instrumental ensembles and vocal arrangements.
The song also proves effective during youth group meetings, retreats, and conferences, fostering a spirit of reverence and connection with the divine. Its message is easily grasped by younger audiences.
Variations in Sheet Music and Arrangements

Numerous sheet music arrangements of “You Deserve the Glory” are available, catering to diverse musical preferences and skill levels. A commonly found version is in the key of Bb, as indicated on marionoaksag.org, simplifying playability for many instruments.
The time signature is consistently 2/2, contributing to the song’s flowing and worshipful feel. This allows for a graceful and unhurried delivery, enhancing the atmosphere of adoration.
Arrangements extend beyond basic piano and vocal scores, encompassing versions for guitar, choir, and full band. These adaptations often include instrumental interludes and harmonies.
Variations also exist in vocal arrangements, with some incorporating harmonies and descants to enrich the texture. These arrangements can be found through various online music resources and sheet music retailers.
Key of Bb
“You Deserve the Glory” is frequently performed and published in the key of Bb (B-flat major). This key choice is prominently noted on the sheet music available from marionoaksag.org, suggesting its widespread adoption within worship communities.
The selection of Bb likely stems from its suitability for many vocal ranges and common instruments, including guitars and wind instruments; It allows for comfortable singing for both male and female vocalists.
Performing in Bb avoids overly complex chord progressions or vocal demands, making the song accessible to a broader range of musicians and congregations.

While transposing the song to other keys is possible, the Bb version remains the standard, simplifying collaboration and ensuring consistency across different arrangements and performances. This key facilitates ease of learning and replication.
Time Signature (2/2)
“You Deserve the Glory” is written in the time signature of 2/2, also known as cut time. This is clearly indicated on the sheet music sourced from marionoaksag.org, a crucial detail for musicians interpreting the piece.
The 2/2 time signature implies two beats per measure, with a half note receiving one beat. This creates a flowing, lyrical feel, distinct from the more common 4/4 time.
Musically, 2/2 often lends itself to a sense of grandeur and reverence, fitting the song’s theme of worship and adoration. It encourages a deliberate and sustained musical phrasing.
Understanding the 2/2 time signature is essential for accurate rhythm and tempo. It influences how the melody and harmonies are perceived, contributing to the song’s overall emotional impact and worshipful atmosphere.
Arrangements for Different Instruments
While the core sheet music available, such as the Bb version from marionoaksag.org, is typically geared towards piano and vocal accompaniment, “You Deserve the Glory” lends itself beautifully to diverse instrumental arrangements.
Guitarists often adapt the chords for strumming or fingerpicking, while string ensembles can create rich harmonic textures. Brass instruments can powerfully proclaim the melody, enhancing the song’s celebratory nature.
The simplicity of the harmonic structure makes it accessible for various skill levels. Arrangements can range from simple acoustic renditions to full band orchestrations, depending on the context and available resources.
Creative musicians frequently incorporate woodwinds or even percussion to add depth and nuance. The song’s adaptable nature allows for personalized interpretations, enriching the worship experience.
Finding Additional Resources Online
Beyond the primary sources like marionoaksag.org and Scribd, a wealth of resources for “You Deserve the Glory” exists online. YouTube hosts numerous performance videos, offering insights into different interpretations and arrangements.
Worship-focused websites and forums often feature chord charts, lead sheets, and even user-submitted arrangements. Searching for “You Deserve the Glory chords” or “Eva-Lena Hellmark sheet music” yields a variety of results.
CCLI’s SongSelect platform (subject to terms of use) provides access to legal lyric and chord charts for licensed users. Websites specializing in Christian music resources may also offer supplementary materials.
Social media groups dedicated to worship music frequently share arrangements and discuss the song. Remember to respect copyright and licensing when utilizing online resources, ensuring compliance with CCLI guidelines.
Related Songs by Eva-Lena Hellmark
Eva-Lena Hellmark is a prolific songwriter with a catalog extending beyond the widely known “You Deserve the Glory.” While comprehensive discographies are not readily available through the provided sources, exploring Christian music databases reveals several other compositions.
Her work often centers on themes of worship, adoration, and the power of faith, mirroring the lyrical content of “You Deserve the Glory.” Many of her songs are utilized in contemporary worship settings globally.
Searching online music platforms and worship resource websites can uncover additional titles penned by Hellmark. Resources like CCLI and SongSelect may list other songs available for licensing.
Discovering these related works provides a broader appreciation for Hellmark’s contribution to the contemporary Christian music landscape and her consistent focus on glorifying God.
Impact and Reception of the Song
“You Deserve the Glory” has become a staple in numerous churches and worship gatherings worldwide, demonstrating a significant impact on contemporary Christian worship. Its simple yet profound lyrics resonate with congregations, fostering an atmosphere of adoration and praise.
The song’s accessibility, coupled with its uplifting melody, contributes to its widespread adoption. The availability of the lyrics in PDF format, as evidenced by resources like marionoaksag.org and Scribd, further facilitates its use by worship teams and individuals.
Online discussions and user comments suggest a positive reception, with many describing the song as deeply moving and spiritually enriching.
Its enduring popularity, indicated by its continued presence in CCLI’s reporting, solidifies its place as a modern hymn of praise.
“You Deserve the Glory” remains a powerfully relevant and widely embraced song within the Christian worship community. Its lyrical simplicity and message of adoration continue to inspire and uplift believers globally.
The readily available PDF versions of the lyrics, sourced from platforms like marionoaksag.org and Scribd, ensure accessibility for worship leaders and individuals seeking to connect with the song’s message.
Understanding the CCLI licensing (Song #1240868) and SongSelect terms is crucial for legal and ethical usage within church settings.
Ultimately, “You Deserve the Glory” serves as a beautiful expression of faith, offering a timeless invitation to worship and acknowledge the greatness of God.