A White Heron‚ a timeless short story by Sarah Orne Jewett‚ explores themes of nature‚ sacrifice‚ and isolation. Available as a PDF‚ it offers convenient access for readers worldwide‚ making it an essential resource for literary studies and personal enjoyment. The story follows Sylvia‚ a young girl‚ and her profound connection with the natural world‚ highlighting moral dilemmas and human connection. Its availability in digital formats ensures its relevance in contemporary education and reading experiences.
1.1 Overview of the Short Story
A White Heron‚ written by Sarah Orne Jewett‚ is a poignant tale of a young girl named Sylvia and her deep connection to nature. Published in 1886‚ the story revolves around Sylvia’s encounter with a hunter and her subsequent moral dilemma involving a rare white heron. The narrative explores themes of sacrifice‚ isolation‚ and the human relationship with the environment. Its concise yet profound storytelling has made it a classic in American literature‚ with the PDF version ensuring accessibility for modern readers to appreciate its timeless beauty and depth.
1.2 Importance of the PDF Version
The PDF version of A White Heron offers unparalleled accessibility‚ allowing readers to engage with the story anytime‚ anywhere. This digital format preserves the original text’s integrity while enabling easy sharing and storage. For students and educators‚ the PDF is invaluable for annotations and study purposes. Its widespread availability on platforms like AbeBooks and online archives ensures that Sarah Orne Jewett’s timeless tale reaches a global audience‚ fostering a deeper appreciation for her work and its place in American literary history.
1.3 Brief Biography of Sarah Orne Jewett
Sarah Orne Jewett‚ born in 1849 in South Berwick‚ Maine‚ was a prominent American author known for her contributions to regionalist literature. Her works often explored the lives and customs of New England‚ reflecting her deep connection to the area. Jewett’s friendship with notable writers like Willa Cather highlighted her influence in literary circles. She passed away in 1909‚ leaving behind a legacy of stories that continue to resonate‚ including A White Heron‚ first published in book form in 1886. Her writing remains a cherished part of American literary history.
Plot Summary of “A White Heron”
A White Heron follows Sylvia‚ a young girl living in the forest‚ as she encounters a hunter seeking a rare white heron. Torn between helping him and protecting the bird‚ Sylvia faces a moral dilemma‚ highlighting themes of nature‚ sacrifice‚ and isolation in a poignant tale of human connection with the environment.
2.1 Main Characters and Their Roles
The story revolves around Sylvia‚ a young‚ isolated girl living in the forest‚ who embodies innocence and a deep connection with nature. The hunter‚ a charismatic ornithologist‚ arrives seeking the elusive white heron‚ creating tension and moral conflict. The white heron itself symbolizes purity and the untamed beauty of nature‚ central to the story’s themes of sacrifice and preservation. Sylvia’s grandmother‚ though less prominent‚ provides a grounding influence‚ highlighting Sylvia’s isolation and her unique bond with the natural world.
2.2 Key Events in the Story
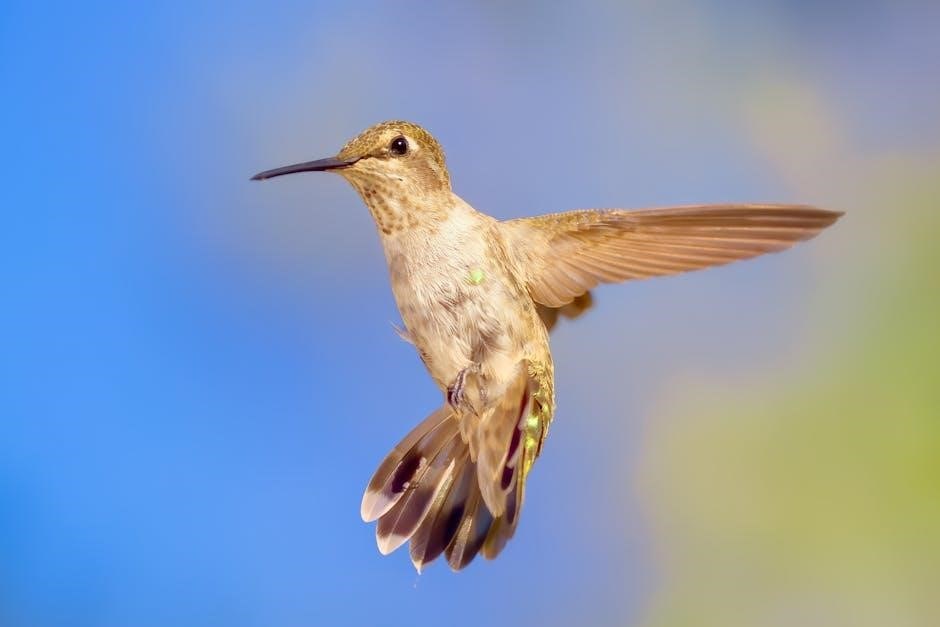
The narrative unfolds with Sylvia‚ a young girl‚ encountering a hunter seeking the rare white heron. Her decision to guide him sparks tension‚ as she faces a moral dilemma between helping him and protecting the bird. Climbing a tall tree‚ Sylvia spots the heron‚ symbolizing her deep connection with nature. The hunter’s offer of money for the heron intensifies her internal conflict. Ultimately‚ Sylvia chooses to spare the heron‚ highlighting her loyalty to nature and her isolation from human desires‚ resolving the story with a poignant reflection on sacrifice and preservation.
2.3 Themes and Symbolism
A White Heron explores themes of nature‚ sacrifice‚ and isolation. The white heron symbolizes purity and the untouched beauty of the natural world‚ while Sylvia’s journey reflects her deep connection to the environment. Her decision to protect the heron highlights a moral dilemma between human desires and nature’s preservation. The story also delves into isolation‚ as Sylvia’s choice distances her from others‚ emphasizing her unique bond with the wilderness. These themes resonate deeply‚ making the story a timeless reflection on humanity’s relationship with nature.
Publication and Availability
A White Heron is widely available in PDF and print formats. First published in 1886‚ it can be downloaded from reliable sources or found in libraries and bookstores like AbeBooks.
3.1 First Publication in Book Form
A White Heron was first published in book form in 1886 as part of the collection A White Heron and Other Stories. This marked a significant milestone in Sarah Orne Jewett’s literary career‚ as it showcased her regionalist style and deep connection to nature. The story has since become a classic‚ celebrated for its exploration of themes like isolation and moral dilemmas. Its initial publication set the stage for its enduring impact on American literature.
3.2 Sources for Downloading the PDF
The PDF version of A White Heron is widely available from reliable sources. Platforms like Google Books‚ Project Gutenberg‚ and ManyBooks offer free downloads. Additionally‚ websites such as AbeBooks and Internet Archive provide access to the story in various digital formats. These sources ensure that readers can easily access and enjoy Sarah Orne Jewett’s timeless tale. The convenience of digital formats makes the story accessible to a global audience‚ preserving its literary significance for future generations.
3.3 Print Editions and Where to Find Them
Print editions of A White Heron are available through various retailers and libraries. AbeBooks and AbeBooks.co.uk offer a wide range of copies‚ including rare and modern prints. Local bookstores and online retailers like Amazon also carry the story in book form. Additionally‚ libraries worldwide provide access to physical copies‚ making it easy for readers to explore the story in its original format. These print editions ensure that Sarah Orne Jewett’s work remains accessible and enjoyable for audiences who prefer traditional reading experiences.

Themes and Analysis
A White Heron explores themes of nature‚ sacrifice‚ and isolation. Sylvia’s journey reflects moral dilemmas and the symbolic significance of the heron‚ emphasizing purity and the natural world.
4.1 The Role of Nature in the Story
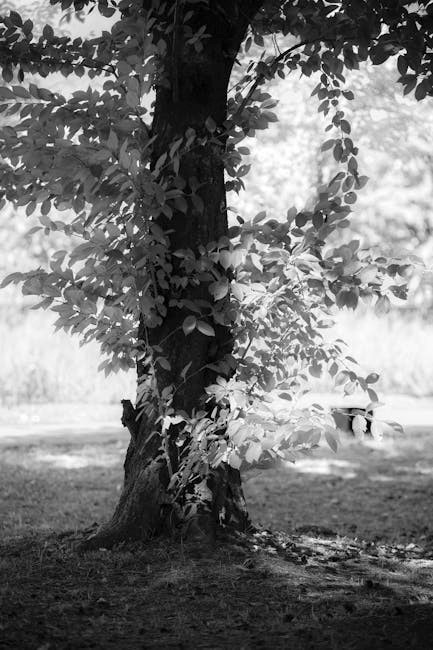
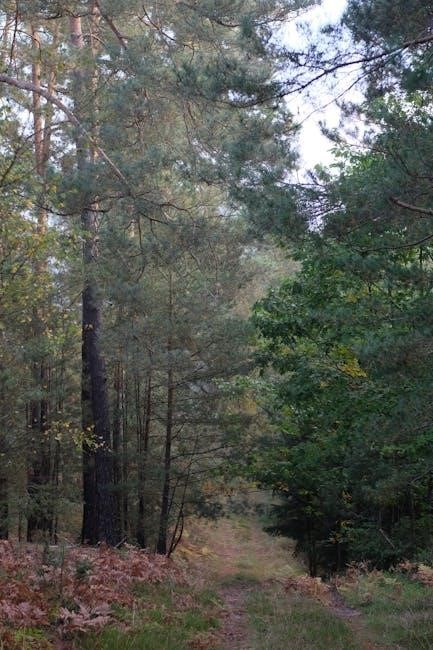
Nature plays a central role in A White Heron‚ serving as both a character and a backdrop. The Maine woods‚ with their dense trees and wildlife‚ shape Sylvia’s identity and decisions. The white heron symbolizes purity and freedom‚ embodying the untouched beauty of nature. Sylvia’s deep connection to the land highlights her isolation from human society‚ while the hunter’s presence introduces a clash between nature and human ambition. The story underscores the importance of preserving natural beauty and the moral dilemmas it presents.
4.2 Sacrifice and Moral Dilemmas
In A White Heron‚ Sylvia faces a profound moral dilemma when a hunter offers her money to reveal the white heron’s location. Torn between financial gain and protecting the bird she cherishes‚ Sylvia ultimately chooses to sacrifice her desire for wealth to preserve the heron’s freedom. This decision highlights her deep connection to nature and her commitment to safeguarding it‚ even at personal cost. The story explores the tension between human ambition and the preservation of natural beauty‚ leaving readers to reflect on the value of sacrifice for a greater cause.
4.3 Isolation and Human Connection
Sylvia’s isolated life in the wilderness highlights her deep bond with nature‚ yet her encounter with the hunter introduces a rare human connection. The hunter’s presence disrupts her solitude‚ offering companionship but also a moral challenge. Sylvia’s ultimate choice to protect the heron over material gain underscores her preference for isolation and harmony with nature. This duality reflects the story’s exploration of solitude versus human interaction‚ emphasizing Sylvia’s internal conflict and the enduring appeal of a life untouched by worldly influences.

Characters in “A White Heron”
Sylvia‚ the young protagonist‚ embodies innocence and a deep connection with nature. The hunter represents external influence and moral conflict‚ while the white heron symbolizes purity and sacrifice.
5.1 Sylvia: The Protagonist
Sylvia‚ a young‚ isolated girl‚ is the heart of the story. Her deep bond with nature and animals highlights her innocence and resilience. Living in a remote forest‚ Sylvia’s life is disrupted by the arrival of a hunter‚ forcing her to confront moral choices. Her journey symbolizes the clash between human desires and the preservation of nature. Available in PDF formats‚ Sylvia’s story remains accessible for readers to explore her emotional depth and the themes she embodies.
5.2 The Hunter: His Motivations
The hunter‚ a skilled ornithologist‚ is driven by his passion for birds and scientific discovery. His primary goal is to find and study the elusive white heron‚ adding it to his collection. Charismatic and respectful‚ he gains Sylvia’s trust‚ offering her money in exchange for the heron’s location. His motivations blend scientific curiosity with personal ambition‚ creating tension in the story. The hunter’s presence disrupts Sylvia’s peaceful life‚ forcing her to confront a moral dilemma between nature’s preservation and human desire.
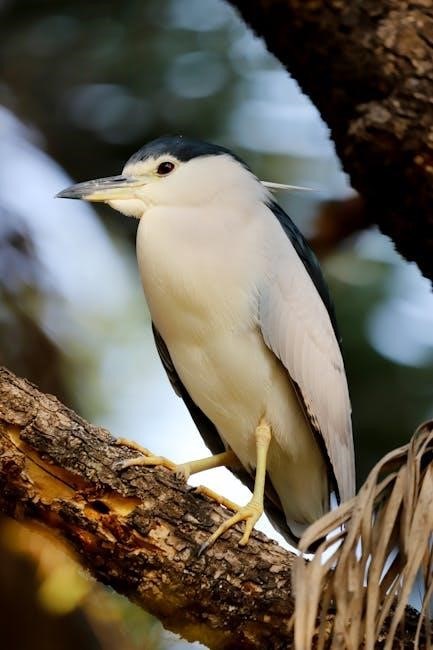
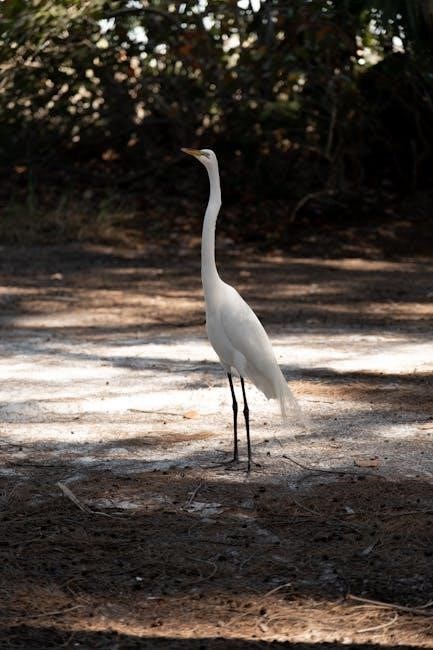
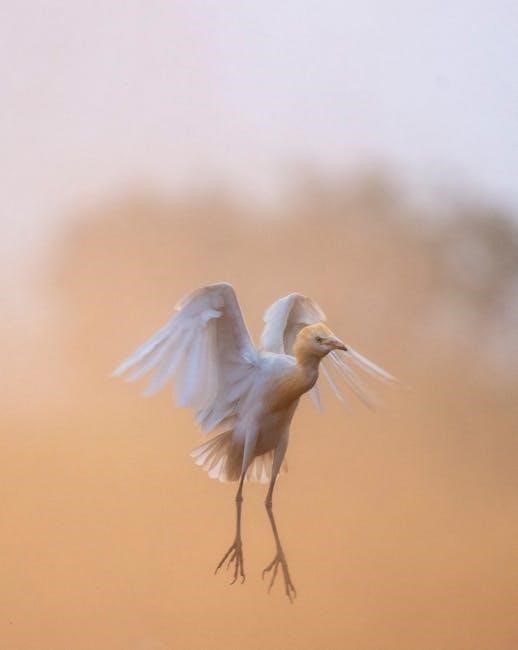
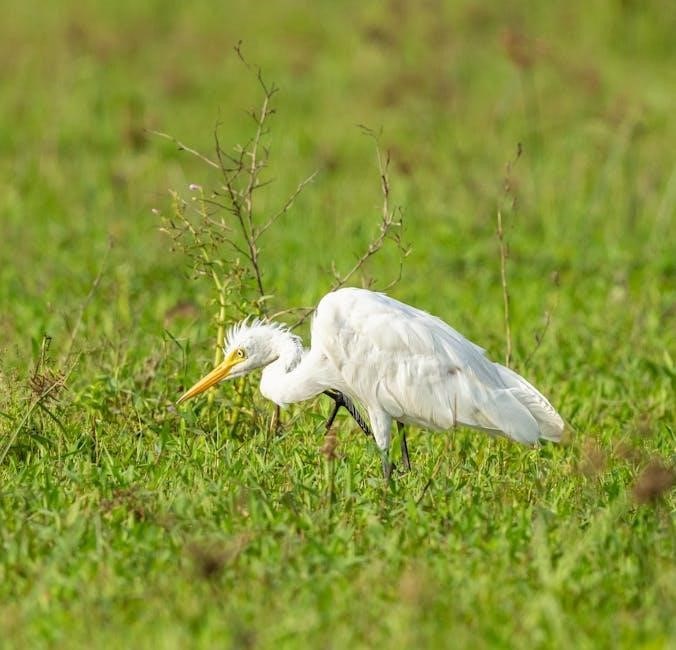
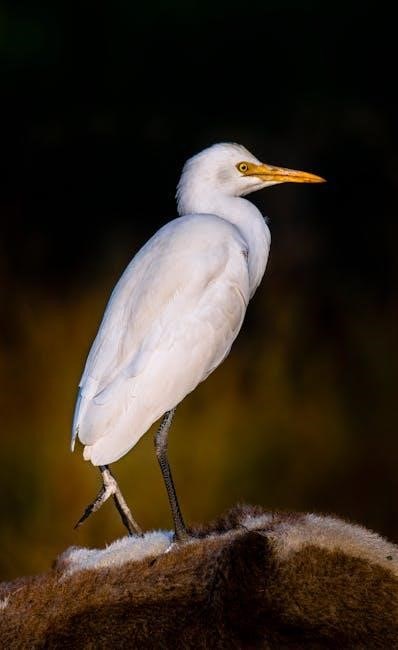
5.3 The White Heron: Symbolism and Significance
The white heron symbolizes purity‚ freedom‚ and the untouched beauty of nature. It represents Sylvia’s deep connection to the natural world and her inner conflict. The heron’s elusive presence highlights the fragility of wilderness and the human impact on it. As a moral symbol‚ the heron embodies the choice between preservation and exploitation‚ reflecting Sylvia’s ultimate decision to protect it. This underscores the story’s themes of sacrifice and environmental stewardship‚ making the heron a powerful and enduring symbol in American literature.
PDF and Digital Versions
A White Heron is widely available in PDF format‚ offering readers a convenient way to access the story. Platforms like Project Gutenberg provide free downloads‚ ensuring easy access for both academic and casual readers. The digital version preserves the original text’s integrity while making it accessible on modern devices‚ catering to a broad audience interested in classic American literature.
6.1 Free PDF Downloads from Reliable Sources
A White Heron is available for free download in PDF format from trusted platforms like Project Gutenberg‚ Google Books‚ and Internet Archive. These sources ensure high-quality‚ copyright-free versions of the story‚ preserving its original text. Readers can access the PDF without registration‚ making it easily accessible for educational or personal use. Additionally‚ platforms like ManyBooks and HathiTrust offer downloadable versions‚ ensuring widespread availability of this classic tale by Sarah Orne Jewett.
6.2 Platforms Offering the Story in PDF Format
Several platforms provide A White Heron in PDF format‚ including Project Gutenberg‚ Google Books‚ and Internet Archive. These websites offer free access to the story‚ ensuring its availability to a global audience. ManyBooks and HathiTrust also host the PDF version‚ making it easily downloadable for readers. These platforms are reliable sources for classic literature‚ and some may require users to create an account for access. They are popular among readers and educators for their extensive libraries of public-domain works.
6.3 Reading the Story Online
Readers can access A White Heron online through platforms like Project Gutenberg‚ Google Books‚ and Internet Archive. These websites offer the story in a web-friendly format‚ allowing readers to enjoy it directly in their browsers. Many platforms provide features like adjustable font sizes and night mode for a comfortable reading experience. Some sites may require users to create an account‚ while others offer guest access. This convenience makes the story accessible to anyone with an internet connection‚ promoting its reach and readability in the digital age.
Study Guides and Resources
Study guides and resources for A White Heron include lesson plans‚ discussion questions‚ and analysis of literary devices. These tools aid in understanding the story’s themes and characters‚ making it easier for students and educators to explore the text effectively.
7.1 Lesson Plans for Educational Use
Lesson plans for A White Heron are widely available‚ offering structured approaches for educators. These plans often include activities‚ discussion prompts‚ and thematic analysis. Many resources‚ such as those accompanying the VOA Learning English episode‚ provide transcripts and teaching aids. Educators can use these materials to explore themes like nature‚ sacrifice‚ and isolation. The story’s concise nature makes it ideal for classroom study‚ allowing for deep dives into literary devices and moral dilemmas. These resources enhance students’ understanding and engagement with the text.
7.2 Discussion Questions and Essay Prompts
Discussion questions and essay prompts for A White Heron encourage deep analysis of its themes and characters. Questions might include: How does Sylvia’s relationship with nature shape her decisions? What moral dilemmas does she face? Essay prompts could explore her sacrifice‚ the symbolism of the heron‚ and the tension between isolation and connection. These exercises help students engage with the story’s emotional and ethical complexity‚ fostering critical thinking and literary understanding. They are ideal for classroom discussions and written assignments.
7.3 Analysis of Literary Devices
Sarah Orne Jewett employs vivid imagery and symbolism in A White Heron‚ with the heron representing purity and innocence. The story’s regionalist style highlights rural life‚ while its concise language emphasizes emotional depth. Jewett uses foreshadowing to build tension‚ particularly in Sylvia’s encounter with the hunter. The narrative’s focus on nature underscores themes of isolation and connection. These literary devices create a poignant exploration of moral choices and the human relationship with the environment‚ making the story a rich text for analytical study and discussion.

Historical Context
A White Heron‚ published in 1886‚ reflects late 19th-century American Regionalism‚ capturing rural life and nature’s significance. Its themes resonate with the era’s values and challenges.
8.1 The Setting of the Story
The story is set in a rural‚ coastal area of Maine in the late 19th century‚ reflecting Jewett’s focus on regionalism. The dense forest‚ farmhouse‚ and marsh create a vivid backdrop‚ emphasizing isolation and nature’s beauty. The setting plays a crucial role in shaping Sylvia’s character and her deep connection to the environment. The time period highlights the simplicity of rural life and the clash between human needs and nature’s preservation‚ central to the story’s themes and moral dilemmas.
8.2 Sarah Orne Jewett’s Writing Style
Sarah Orne Jewett’s writing style in A White Heron is characterized by regionalism‚ focusing on the lives of ordinary people in rural Maine. Her prose is descriptive and evocative‚ creating vivid imagery of nature and the human experience. Jewett’s calm‚ reflective narrative voice enhances the story’s emotional depth‚ exploring themes of isolation and connection. Her attention to detail and nuanced portrayal of characters and settings have made her work enduring in American literature‚ with the PDF version preserving her original style for modern readers.
8.3 Regionalism in American Literature
A White Heron exemplifies regionalism in American literature‚ focusing on the unique culture and landscape of rural Maine. Sarah Orne Jewett’s vivid descriptions of nature and local life highlight the region’s distinct character. The story’s emphasis on isolation and human connection reflects the realities of rural communities. As a PDF‚ the text remains accessible‚ preserving its regionalist themes for modern readers. Jewett’s work is celebrated for its authentic portrayal of regional life‚ making it a cornerstone of American literary regionalism.
Literary Significance
A White Heron holds a revered place in American literature‚ celebrated for its profound exploration of nature‚ sacrifice‚ and isolation. Its enduring themes resonate across generations‚ solidifying its status as a classic. The story’s emotional depth and moral complexity have garnered critical acclaim‚ influencing numerous writers. Available as a PDF‚ it remains accessible‚ ensuring its literary significance endures in the digital age.
9.1 Impact on American Literature
A White Heron has left an indelible mark on American literature‚ particularly in the regionalism movement. Its vivid portrayal of rural life and nature resonated deeply‚ influencing later writers. The story’s emotional depth and moral complexity have made it a cornerstone of literary studies. Its availability in PDF format ensures accessibility‚ allowing new generations to appreciate its timeless themes. As a celebrated work‚ it continues to inspire writers and remains a significant contribution to the American literary canon‚ fostering a deeper understanding of human and environmental connections.
9.2 Critical Reception of the Story
A White Heron has received widespread critical acclaim for its emotional depth and nuanced exploration of moral dilemmas. Critics praise its vivid portrayal of nature and the protagonist’s internal conflict. The story’s regionalist style‚ capturing rural life in Maine‚ has been particularly celebrated. Its themes of sacrifice and isolation resonate universally‚ making it a beloved classic. Available in PDF‚ the story remains accessible for modern readers‚ ensuring its enduring popularity and educational value in literary studies.
9.3 Influence on Other Writers
A White Heron has left a lasting impact on American literature‚ inspiring writers with its regionalist style and deep exploration of human and natural connections. Jewett’s ability to weave moral dilemmas and emotional depth has influenced authors focusing on local color and character-driven narratives. The story’s themes of sacrifice and isolation have resonated with writers exploring similar complexities. Its availability in PDF ensures easy access for scholars and aspiring writers‚ cementing its role in shaping literary traditions and continuing to inspire new generations of storytellers.
Modern Relevance
A White Heron remains relevant today‚ offering timeless themes of environmental stewardship and moral choices. Its availability in PDF ensures easy access for modern readers and educators‚ making it a valuable resource for exploring contemporary issues like conservation and human-nature relationships. The story’s universal themes continue to resonate‚ providing insights into modern dilemmas and the importance of preserving natural beauty for future generations.

10.1 Contemporary Themes in the Story
A White Heron explores themes that remain deeply relevant today‚ such as environmentalism‚ sacrifice‚ and isolation. The story highlights the clash between human progress and nature‚ resonating with modern concerns about conservation. Sylvia’s dilemma reflects contemporary moral choices‚ where personal gain often conflicts with ethical responsibilities. The story also underscores the importance of human connection in a world increasingly dominated by technology. These timeless themes make A White Heron a powerful tool for discussing modern issues like sustainability and individual responsibility.
10.2 Environmental Themes
A White Heron vividly portrays the deep bond between humanity and nature‚ emphasizing the importance of environmental preservation. The story highlights the delicate balance between human needs and ecological harmony‚ a theme that resonates strongly in today’s context of climate change and conservation efforts. Sylvia’s connection to the forest and its creatures underscores the ethical responsibility to protect natural habitats. The heron‚ as a symbol of purity and fragility‚ serves as a powerful reminder of the need to safeguard wildlife and ecosystems for future generations.
10.3 Digital Access to the Story
A White Heron is widely available in digital formats‚ including PDF‚ ensuring easy access for modern readers. Platforms like Google Books‚ Project Gutenberg‚ and online libraries offer free downloads‚ making the story accessible worldwide. Digital versions provide convenience‚ allowing readers to enjoy the narrative on various devices. This accessibility has helped preserve the story’s relevance‚ enabling new generations to engage with its timeless themes and appreciate its literary significance in a contemporary context.
A White Heron remains a cherished tale‚ its PDF availability ensuring accessibility. It beautifully portrays nature’s allure and the complexity of human decisions‚ resonating deeply with readers.
11.1 Summary of Key Points
A White Heron‚ by Sarah Orne Jewett‚ is a poignant tale of a young girl‚ Sylvia‚ and her deep connection with nature. The story explores themes of sacrifice‚ isolation‚ and moral dilemmas‚ symbolized by the elusive white heron. Its availability in PDF format has made it accessible for modern readers‚ ensuring its educational and literary value endures. The narrative highlights the beauty of regionalism in American literature‚ offering insights into human relationships with the environment and each other‚ making it a timeless classic for both study and personal reflection;
11.2 Final Thoughts on the Story’s Importance
A White Heron remains a significant work in American literature‚ offering timeless themes of nature‚ sacrifice‚ and human connection. Its availability in PDF format ensures accessibility for modern readers‚ making it a valuable resource for educational and personal enrichment. The story’s exploration of moral dilemmas and environmental themes resonates deeply‚ encouraging reflection on humanity’s relationship with the natural world. As a classic of regionalist literature‚ it continues to inspire readers and scholars‚ cementing its place as a cherished and enduring tale.