Categories
Instructions

buzzy seeds grow kit instructions

Buzzy Seeds Grow Kits offer a fun and easy way to start gardening‚ providing everything needed to cultivate herbs‚ flowers‚ or vegetables. Perfect for all skill levels‚ these kits ensure a rewarding experience.

Overview of the Buzzy Seeds Grow Kit

The Buzzy Seeds Grow Kit is a comprehensive‚ all-in-one gardening solution designed to simplify the process of growing plants from seeds. Each kit typically includes high-quality seeds‚ a growing medium‚ a container‚ and detailed step-by-step instructions; These kits cater to a wide range of plants‚ such as herbs‚ flowers‚ and vegetables‚ making them versatile for different gardening interests. They are particularly popular for their convenience and ease of use‚ appealing to both beginners and experienced gardeners. The kits are designed to promote a fun and educational gardening experience‚ ensuring success with minimal effort. By providing everything needed to get started‚ Buzzy Seeds Grow Kits make gardening accessible and enjoyable for everyone‚ regardless of skill level or prior experience. They are ideal for indoor or outdoor use‚ offering a rewarding way to cultivate your own plants with ease.

Importance of Following Instructions

Following the instructions provided with the Buzzy Seeds Grow Kit is essential for achieving successful plant growth. The step-by-step guide is carefully designed to ensure optimal conditions for germination and development‚ catering to the specific needs of the included seeds and growing medium. Deviating from the instructions can lead to issues such as poor germination‚ overwatering‚ or inadequate lighting‚ which may negatively impact plant health. By adhering to the guidelines‚ users can create a nurturing environment that promotes robust growth and vibrant results. The instructions are user-friendly‚ making it easy for both beginners and experienced gardeners to follow. They also include helpful tips and troubleshooting advice to address common challenges. Properly following the instructions ensures a stress-free and rewarding gardening experience‚ allowing users to enjoy the full potential of their Buzzy Seeds Grow Kit.

Components of the Buzzy Seeds Grow Kit

The Buzzy Seeds Grow Kit includes high-quality seeds‚ a growing medium‚ a container‚ and detailed instructions‚ providing everything needed to start gardening with ease and success.

Seeds Included in the Kit

The Buzzy Seeds Grow Kit includes high-quality seeds specifically chosen for their robust growth and vibrant results. These seeds are selected to ensure a rewarding experience‚ catering to a variety of plants such as herbs‚ flowers‚ and vegetables. Whether you’re growing grass‚ colorful blooms‚ or edible plants‚ the seeds provided are designed to thrive with proper care. The kits often focus on popular species‚ making them ideal for both indoor and outdoor use. The seeds are packaged to maintain freshness and viability‚ ensuring optimal germination rates. This selection makes the Buzzy Seeds Grow Kit a great choice for beginners and experienced gardeners alike‚ offering a fun and educational way to cultivate your own plants with minimal effort and expertise.

Growing Medium Provided

The Buzzy Seeds Grow Kit includes a high-quality growing medium designed to support healthy plant growth. Typically‚ the medium comes in the form of dehydrated pellets that need to be rehydrated before use. To prepare‚ simply soak the pellets in water‚ allowing them to expand and form a nutrient-rich soil substitute. This growing medium is specifically formulated to retain the right amount of moisture while providing adequate drainage‚ ensuring roots develop properly. It is mess-free and easy to handle‚ making it ideal for indoor gardening. The medium is also sterilized to minimize the risk of pests or diseases‚ giving your seeds the best chance to thrive. Once hydrated‚ the growing medium is ready to use‚ requiring no additional preparation. This convenient and effective solution is a key component of the Buzzy Seeds Grow Kit‚ simplifying the gardening process for users of all skill levels.

Container Specifications

The Buzzy Seeds Grow Kit includes a durable‚ compact container designed specifically for indoor gardening. Made from high-quality‚ food-grade materials‚ the container is lightweight and easy to clean‚ ensuring long-term usability. It features drainage holes at the bottom to prevent waterlogged soil‚ promoting healthy root development. The container’s size is optimized for small spaces‚ making it ideal for apartments‚ balconies‚ or countertops. Its sleek design blends seamlessly into any home decor‚ adding a touch of greenery to your living space. The container is also reusable‚ allowing you to grow multiple batches of plants. With clear instructions provided‚ assembling and preparing the container is straightforward‚ requiring minimal effort. This thoughtfully designed container is a key component of the Buzzy Seeds Grow Kit‚ ensuring a hassle-free and enjoyable gardening experience for users of all skill levels.

Detailed Instructions

The Buzzy Seeds Grow Kit comes with clear‚ step-by-step instructions designed to guide users through every stage of the growing process. From preparing the growing medium to nurturing the seedlings‚ the instructions are easy to follow and require minimal effort. The kit includes a comprehensive guide that covers hydration of the growing medium‚ proper seed placement‚ and optimal care routines. Users are advised to start by hydrating the growing medium‚ ensuring it reaches the right consistency before planting the seeds. The instructions also emphasize the importance of providing adequate light‚ maintaining proper hydration‚ and monitoring temperature levels. Additional tips are provided to address common challenges‚ such as overwatering or pests‚ ensuring a successful growing experience. Whether you’re a beginner or an experienced gardener‚ the detailed instructions make it easy to achieve vibrant results with your Buzzy Seeds Grow Kit.

Benefits of Using the Buzzy Seeds Grow Kit

Buzzy Seeds Grow Kits offer a convenient‚ cost-effective way to garden‚ providing everything needed for success. They are perfect for all skill levels‚ promoting a fun and educational growing experience.

Ease of Use for Beginners

Buzzy Seeds Grow Kits are specifically designed to be user-friendly‚ making them an excellent choice for beginners. Each kit includes clear‚ step-by-step instructions that guide users through every stage of the growing process‚ from preparing the growing medium to nurturing seedlings. The all-in-one design ensures that everything needed is provided‚ eliminating the guesswork often associated with gardening. Whether you’re planting herbs‚ flowers‚ or vegetables‚ the straightforward approach of these kits makes it easy to achieve success. Additionally‚ the kits are compact and require minimal space‚ making them ideal for indoor or outdoor use. The comprehensive instructions and supportive resources offered by Buzzy Seeds help beginners build confidence and enjoy a stress-free gardening experience. This ease of use ensures that even those with no prior gardening knowledge can successfully grow their own plants and enjoy the rewards of gardening.

Cost-Effectiveness

Buzzy Seeds Grow Kits are a cost-effective solution for gardening enthusiasts‚ offering a complete package at an affordable price. Each kit includes high-quality seeds‚ a growing medium‚ a container‚ and detailed instructions‚ eliminating the need for additional purchases. This all-in-one design makes it an economical choice for both beginners and experienced gardeners. The kits cater to a variety of plants‚ from herbs and flowers to vegetables‚ providing versatility without extra costs. By simplifying the gardening process‚ Buzzy Seeds ensures that users can enjoy a successful growing experience without spending more than necessary. The convenience and value provided by these kits make them a budget-friendly option for anyone looking to start or expand their gardening journey. With clear instructions and supportive resources‚ Buzzy Seeds Grow Kits deliver a cost-effective way to grow your own plants with minimal investment.

Step-by-Step Growing Instructions

Buzzy Seeds Grow Kits provide clear‚ step-by-step instructions. Start by preparing the growing medium‚ then plant the seeds‚ and follow care guidelines for optimal growth and a successful harvest experience.

Preparing the Growing Medium

Preparing the growing medium is the first step in using a Buzzy Seeds Grow Kit. Most kits include dehydrated growing medium pellets that need to be hydrated before use. Start by placing the dry pellets in a bowl or container. Gradually add water‚ stirring gently‚ until the medium absorbs the liquid and expands to the recommended consistency. Once hydrated‚ fluff the medium with a fork or spoon to ensure even texture. Transfer the prepared medium into the provided container‚ filling it to the suggested level. Avoid overwatering‚ as this can lead to poor drainage and root issues. Properly prepared growing medium ensures healthy root development and robust plant growth. Follow the kit’s specific instructions for precise measurements and hydration times to achieve the best results for your seeds.
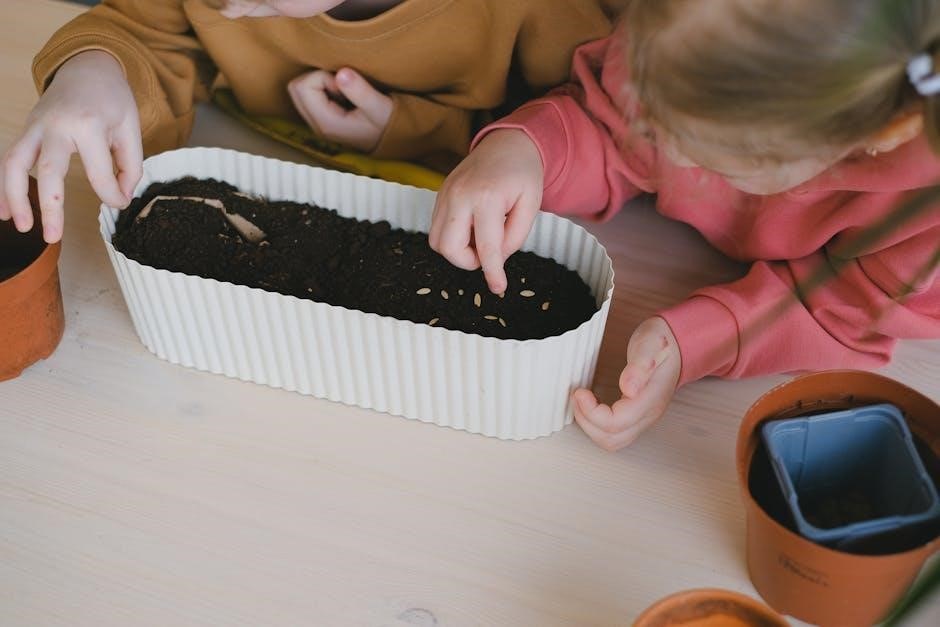
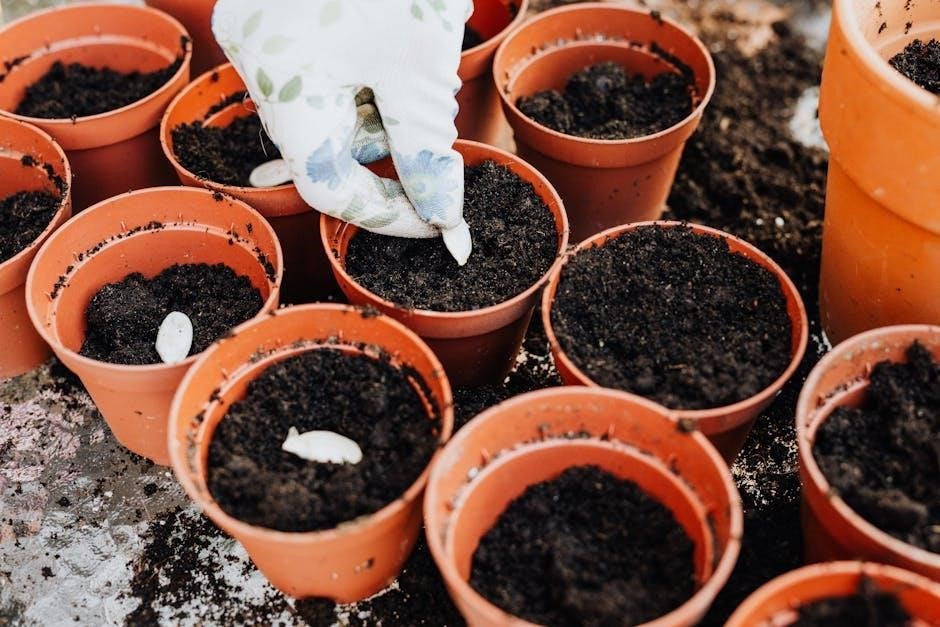
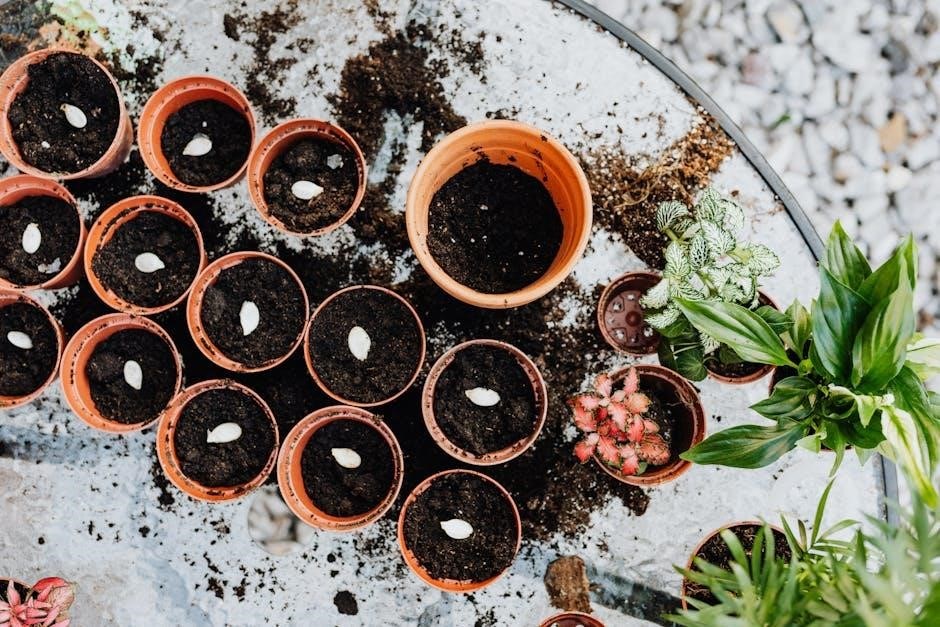
Planting the Seeds

Planting the seeds is a straightforward process that requires attention to detail for optimal results. Once the growing medium is prepared‚ carefully open the seed packet from your Buzzy Seeds Grow Kit. Using your fingers or a pair of tweezers‚ gently place the seeds into the medium at the depth specified in the instructions. For most kits‚ this involves making small holes in the medium‚ typically 1-3 inches apart‚ depending on the plant variety. Cover the seeds lightly with the growing medium‚ ensuring they are evenly spaced and fully enclosed. After planting‚ lightly firm the surface to secure the seeds in place. Water gently but thoroughly to settle the medium around the seeds. Label the container with the plant name and date for easy tracking. Avoid over-handling the seeds‚ as this can damage them. Follow the kit’s guidelines for the number of seeds per container to prevent overcrowding. Proper spacing and gentle handling ensure healthy germination and robust growth.

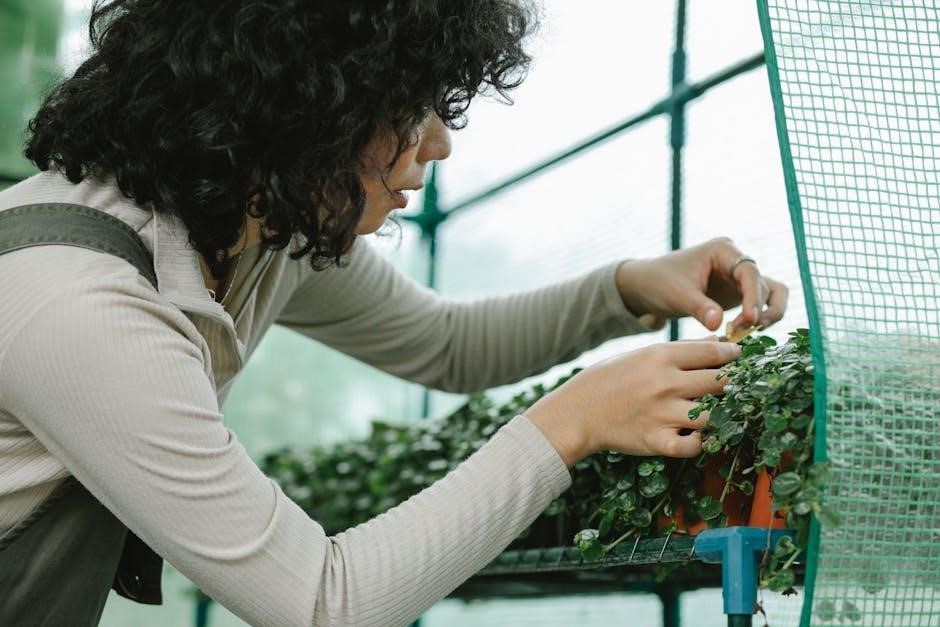
Providing Proper Care

Providing proper care is essential for the success of your Buzzy Seeds Grow Kit. After planting‚ ensure the growing medium is consistently moist but not waterlogged. Overwatering can lead to poor germination or root rot‚ while underwatering may slow growth. Check the soil daily by gently poking your finger into the medium. If it feels dry‚ water lightly but thoroughly. Most plants require indirect sunlight or bright‚ diffused light. Place the container near a sunny window or under grow lights‚ following the kit’s specific lighting recommendations. Maintain a stable temperature between 65-75°F (18-24°C) for optimal growth. Avoid placing the container near heating vents‚ radiators‚ or drafty windows. Humidity can be maintained by covering the container with a clear plastic lid or wrap until germination occurs. Once seedlings emerge‚ remove the cover to prevent mold. Regularly monitor the plants’ progress and adjust care as needed. Proper care ensures healthy growth and a thriving garden.

Common Issues and Troubleshooting

Common issues with Buzzy Seeds Grow Kits include overwatering‚ leading to root rot‚ and pest infestations. Check for signs like yellowing leaves or tiny insects. Solve by adjusting watering schedules and using organic pest control methods.

Overwatering and Its Solutions

Overwatering is a common issue when using Buzzy Seeds Grow Kits‚ often leading to root rot and poor plant growth. Check for symptoms like yellowing leaves or a soggy growing medium. To address this‚ reduce watering frequency and ensure proper drainage. Allow the soil to dry slightly between waterings. If root rot has occurred‚ gently repot the plant in fresh medium. Prevent future issues by using the clear instructions provided with the kit to guide watering schedules. Proper drainage holes in the container are essential to prevent waterlogged soil. By monitoring soil moisture and adjusting care routines‚ you can avoid overwatering and promote healthy plant development. Regularly inspecting the plant and medium will help maintain optimal conditions for growth. This ensures a thriving garden with minimal effort and expertise‚ aligning with the kit’s goal of simplifying gardening for all users.

Dealing with Pests

When using a Buzzy Seeds Grow Kit‚ pests like spider mites‚ mealybugs‚ or aphids can occasionally appear‚ threatening plant health. Early detection is key—look for tiny white spots‚ sticky residue‚ or unusual leaf damage. Isolate the affected plant to prevent the infestation from spreading. Gently clean the container and growing medium‚ ensuring no pests remain. Treat the plant with organic pest control methods‚ such as neem oil or insecticidal soap‚ following the product’s instructions. Avoid harsh chemicals to protect beneficial microorganisms in the growing medium. Regularly inspecting your plants and maintaining a clean growing environment can help prevent pest issues. By addressing the problem promptly and using natural solutions‚ you can safeguard your plants and ensure a successful harvest. This approach aligns with the kit’s goal of making gardening easy and stress-free for all users.

Tips for Successful Growth

For successful growth‚ follow the kit’s instructions‚ maintain optimal conditions‚ and monitor progress regularly. This ensures healthy plant development and a rewarding experience with your Buzzy Seeds Grow Kit.

Optimizing Soil Quality

Optimizing soil quality is essential for the success of your Buzzy Seeds Grow Kit. The kit includes a high-quality growing medium designed to provide the right balance of nutrients and drainage for healthy plant growth. To maintain soil health‚ avoid overwatering‚ as this can lead to root rot and poor drainage. Ensure the growing medium is hydrated properly before planting‚ following the instructions provided. Once planted‚ monitor the soil moisture by gently touching the surface. If it feels dry‚ it’s time to water. Additionally‚ avoid compressing the soil‚ as this can reduce airflow and hinder root development. For best results‚ keep the soil consistently moist but not waterlogged. By following these tips‚ you can create an ideal environment for your seeds to thrive and enjoy a bountiful harvest.

Ensuring Adequate Lighting

Proper lighting is crucial for the healthy growth of plants in your Buzzy Seeds Grow Kit. Most plants require ample light to undergo photosynthesis‚ which fuels their development. Place your kit in a location with bright‚ indirect sunlight‚ such as a sunny windowsill or under grow lights. Avoid direct sunlight‚ as it may cause overheating and dry out the growing medium. If natural light is limited‚ consider using LED grow lights‚ which are energy-efficient and designed to promote plant growth. Ensure the lights are positioned at the recommended distance to avoid burning the leaves. Monitor your plants’ response to light and adjust their placement as needed. Consistent and adequate lighting will help your seeds germinate and thrive‚ leading to a successful and rewarding gardening experience with your Buzzy Seeds Grow Kit.

Watering Best Practices

Proper watering is essential for the success of your Buzzy Seeds Grow Kit. Start by hydrating the growing medium according to the instructions‚ typically by soaking the dehydrated pellets in water until they expand. Once planted‚ water gently but thoroughly to ensure the medium is moist but not soggy. Overwatering can lead to root rot‚ so check the moisture by squeezing a small amount of the medium in your hand—it should feel damp‚ not dripping wet. Water in small increments‚ allowing the top layer to dry slightly between waterings. Avoid getting water on the seeds or seedlings to prevent washing them away. For maintenance‚ water when the growing medium feels dry to the touch‚ usually every 1-3 days depending on the environment. Use room-temperature water to avoid shocking the roots. By following these watering best practices‚ you’ll create an ideal environment for your seeds to germinate and thrive in the Buzzy Seeds Grow Kit.

Additional Resources

Explore online guides and tutorials for detailed tips and troubleshooting. The Buzzy Seeds Grow Kit also offers customer support and educational articles to ensure your gardening journey is successful and enjoyable from start to finish.

Online Guides and Tutorials

For a seamless gardening experience‚ Buzzy Seeds Grow Kits are supported by comprehensive online guides and tutorials. These resources provide step-by-step instructions‚ video demonstrations‚ and troubleshooting tips to address common challenges. Whether you’re a beginner or an experienced gardener‚ the guides cover topics like soil preparation‚ seed planting‚ and care routines. Additionally‚ the tutorials offer expert advice on optimizing growth conditions‚ such as lighting and watering. The online platform also features FAQs and user testimonials‚ sharing tips for achieving the best results. With 24/7 access‚ you can resolve issues quickly and enjoy a stress-free gardening journey. The combination of detailed instructions and interactive content ensures that every user can maximize their kit’s potential and grow thriving plants with confidence. These resources are regularly updated to reflect the latest gardening practices and user feedback.

Categories
PDF

read the mark of athena online pdf

The Mark of Athena, by Rick Riordan, is the third book in The Heroes of Olympus series, blending Greek and Roman mythology. It follows demigods on a quest to unite camps, with Annabeth Chase at the center. The book is praised for its engaging plot, character development, and emotional depth. Fans highlight moments like Percy and Annabeth’s reunion and the epic battle in the Coliseum. Available online as a PDF, it remains a favorite among young adult fantasy readers, though some editions have reported missing pages.

1.1 Overview of the Book

The Mark of Athena is the third installment in The Heroes of Olympus series, continuing the adventures of demigods from Greek and Roman mythology. The story follows Annabeth Chase as she embarks on a perilous quest to Rome, uncovering the secrets of the Mark of Athena. The book is filled with action, emotional depth, and character growth, particularly highlighting Annabeth’s strengths and vulnerabilities. Available online as a PDF, it remains a popular choice for fans of young adult fantasy, though some editions have reported missing pages.

1.2 Popularity and Reception

The Mark of Athena has garnered widespread acclaim for its engaging plot and character development. Fans praise its emotional depth, particularly moments like Percy and Annabeth’s reunion. The book’s popularity is evident in its bestseller status and enthusiastic fan base. However, some readers have noted issues with missing pages in certain editions, which has sparked discussions among the community. Its availability as a PDF has further boosted its accessibility and appeal to young adult fantasy enthusiasts.

1.3 Key Themes and Motifs

The Mark of Athena explores themes of unity, sacrifice, and identity, blending Greek and Roman mythologies. The quest for the Mark of Athena symbolizes the struggle for wisdom and leadership. Annabeth’s journey highlights her growth and internal conflicts, while the prophecy drives the narrative, emphasizing fate and teamwork. The book also delves into emotional and psychological challenges, showcasing the demigods’ resilience and camaraderie in the face of overwhelming odds.

The Heroes of Olympus Series

The series continues Percy Jackson’s saga, blending Greek and Roman mythologies. It introduces new demigods and epic quests, expanding the universe’s depth and adventure, now available online.

2.1 The Series Overview

The Heroes of Olympus series is a continuation of Percy Jackson’s adventures, blending Greek and Roman mythologies. It introduces new demigods and expands the universe, offering epic quests and character growth. The series is beloved for its rich storytelling and cultural influences, with books like The Mark of Athena available online as PDFs, allowing fans to easily access and enjoy the thrilling journeys of their favorite heroes.

2.2 The Role of “The Mark of Athena” in the Series

The Mark of Athena is the third installment in The Heroes of Olympus series, serving as a pivotal bridge between the Greek and Roman demigod worlds. It advances the overarching prophecy, focusing on Annabeth’s quest to follow the Mark of Athena, a symbol of wisdom and leadership. The book deepens character dynamics and sets the stage for future conflicts, making it a crucial chapter in the series’ progression. Available online as a PDF, it remains a key read for fans.

2.3 Connection to Percy Jackson and the Olympians

The Mark of Athena closely ties to the Percy Jackson and the Olympians series, continuing the adventures of beloved characters like Percy and Annabeth. The book expands on the Greek demigod world, introducing Roman mythology elements. Fans of Percy’s earlier quests will appreciate the familiar themes of friendship, bravery, and destiny. The story seamlessly bridges the two series, making it a must-read for followers of Riordan’s universe. Available online as a PDF, it offers easy access to this pivotal narrative.

Main Characters and Their Development

The story centers around Annabeth Chase, Percy Jackson, Jason Grace, Leo Valdez, and Piper McLean. Each character faces personal challenges, showcasing growth, bravery, and loyalty, essential to the quest.

3.1 Annabeth Chase: The Central Character

Annabeth Chase is the heart of The Mark of Athena, showcasing her strategic brilliance and courage. Her solo quest in Rome highlights her strength and vulnerability, while her bond with Percy deepens, revealing her emotional depth and unwavering loyalty. As a leader, she faces immense pressure, yet her determination drives the group forward, making her a compelling and relatable character in the story.

3.2 Percy Jackson: His Role and Growth

Percy Jackson plays a pivotal role in The Mark of Athena, showcasing his bravery and loyalty. His reunion with Annabeth highlights their strong bond, while his leadership alongside Jason demonstrates his maturity. Percy’s growth is evident as he faces challenges, rescues Annabeth, and navigates the quest with humor and resilience. His character evolves, revealing deeper emotional layers and a commitment to protecting his friends and the mission.

3.3 Jason Grace: Leadership and Conflicts

Jason Grace faces significant challenges as a leader in The Mark of Athena. His role as the son of Jupiter and co-leader of the Argo II crew creates tension, especially with Percy. Jason’s leadership is tested as he navigates conflicts with enemies and internal rivalries. His character evolves as he confronts his past, embraces his identity, and strives to unite the demigods. His growth highlights his resilience and determination to protect his friends and fulfill the quest.

3.4 Leo Valdez: Humor and Bravery

Leo Valdez brings humor and bravery to the quest, often lightening tense moments with his jokes. His mechanical skills and ingenuity are crucial to the crew, as seen in his hilarious plan with Frank to scare Chrysaor. Despite his tough exterior, Leo’s loyalty and growth shine, making him a fan favorite. His character adds depth and humor, balancing the story’s intense moments with his unique charm and resilience.

3.5 Piper McLean: Strengths and Challenges

Piper McLean, daughter of Aphrodite, showcases her strengths as a skilled fighter and leader, using her charm effectively. She faces challenges like self-doubt and balancing her role as a hero with personal identity. Her loyalty and empathy make her a vital team member. Despite struggles, Piper’s growth is evident as she confronts fears and proves her bravery, becoming a key figure in the quest.

The Quest for the Mark of Athena

The quest for the Mark of Athena drives the story, as Annabeth and Percy navigate Roman mythology, face challenges, and uncover secrets. Available online as a PDF, the book captivates readers with its epic journey and character growth.

4.1 The Prophecy and Its Significance

The prophecy of the Mark of Athena is central to the quest, foretelling the unification of Greek and Roman demigods. It speaks of “wisdom’s child” and the “giants’ bane,” hinting at Annabeth’s crucial role. The prophecy drives the characters’ actions, creating tension and urgency. Its fulfillment is key to their success, making it a pivotal element in the story. Readers can explore this prophecy in detail by accessing the book online as a PDF.

4.2 The Journey to Rome

The demigods embark on a perilous journey to Rome aboard the Argo II, a magical Greek trireme. Tensions rise as Percy and Jason, leaders from different camps, navigate their rivalry. The journey is fraught with battles, including a climactic fight in the Coliseum against Otis and Ephialtes. Annabeth’s solo quest in Rome’s underground highlights her strength and vulnerability. The PDF version captures the excitement of this pivotal adventure, showcasing the crew’s bravery and unity.

4.3 Challenges and Obstacles

The demigods face numerous challenges on their quest, including epic battles like the one in the Coliseum against Otis and Ephialtes. Annabeth’s solo journey through Rome’s underground tests her courage and wit. The Argo II’s voyage is fraught with dangers, and internal conflicts, such as Percy and Jason’s rivalry, add tension. The PDF version highlights these obstacles, showcasing the crew’s resilience and unity in the face of adversity.

Key Moments and Highlights

Percy and Annabeth’s emotional reunion, the intense Coliseum battle, and Annabeth’s daring solo quest are standout moments. The Argo II’s adventures and Percabeth’s bond shine brightly in the PDF.

5.1 Percy and Annabeth’s Reunion

Percy and Annabeth’s reunion is a heartfelt moment, showcasing their deep bond. After months apart, their interactions are filled with emotion and relief. Percy’s heroic act of saving Annabeth from Octavian highlights his bravery and devotion. Their connection remains a central theme, resonating throughout the story. Fans cherish these moments, making their reunion a memorable highlight in the PDF version of The Mark of Athena.

5.2 The Battle in the Coliseum

The Battle in the Coliseum is a thrilling highlight, featuring Jason and Percy against Otis and Ephialtes. Dionysus transforms the arena into a skeleton-infested pit, intensifying the chaos. The demigods’ teamwork and strategy shine as they face these formidable giants. This epic confrontation is a fan favorite, showcasing both humor and heroism. The PDF version captures the intensity, making it a memorable part of The Mark of Athena.

5.3 Annabeth’s Solo Quest

Annabeth’s solo quest is a pivotal moment, showcasing her courage and wit. She ventures deep into Rome’s underground, facing personal demons and external threats. The PDF version highlights her resilience as she navigates treacherous paths, solving riddles and battling monsters. This section underscores her growth and determination, making it a fan favorite and a testament to her strength as a demigod leader in The Mark of Athena.

5.4 The Argo II and Its Crew

The Argo II, a magical Greek trireme, serves as the demigods’ primary vessel, symbolizing unity and strength. Its crew, including Jason, Annabeth, Percy, Leo, Piper, and Frank, embodies diverse skills and camaraderie. The PDF version details their journey to Rome, where they face challenges that test their leadership and teamwork. The ship’s role is central to the quest, highlighting the crew’s resilience and bond as they navigate treacherous skies and battles, showcasing their collective growth and determination.

The Book’s Reception and Reviews

The Mark of Athena is highly praised for its engaging plot and character development. Fans highlight Percy and Annabeth’s reunion as a standout moment. The PDF version is widely popular, making the book easily accessible to readers worldwide, further boosting its acclaim and fan enthusiasm for the series.

6.1 Fan Reactions and Feedback

Fans praised The Mark of Athena for its emotional depth and thrilling plot. The reunion of Percy and Annabeth was a highlight, with readers celebrating their interactions. The battle in the Coliseum and Annabeth’s solo quest were also well-received. The PDF version’s accessibility made it easier for global fans to engage, sparking lively discussions and predictions about the series’ future. Enthusiasts shared their excitement online, creating a vibrant community around the book.

6.2 Critical Acclaim and Ratings

The Mark of Athena received widespread critical acclaim for its engaging plot and character development. Reviewers praised Rick Riordan’s ability to weave Greek and Roman mythology into a compelling narrative. The book holds high ratings, with fans and critics alike celebrating its emotional depth and suspenseful twists. Its availability as a PDF further boosted its reach, making it accessible to a global audience and solidifying its place as a fan favorite in the series.

6.4 Comparisons with Other Books in the Series

The Mark of Athena is often compared to earlier books in the Heroes of Olympus series, with fans noting its unique blend of action and emotional depth. While some prefer the tighter focus of the first two books, others praise its epic scale and character development. The reunion of Percy and Annabeth, along with the group’s dynamic aboard the Argo II, sets it apart, making it a standout installment for many readers.

Cultural and Literary Impact

The Mark of Athena has significantly influenced young adult fantasy, blending Greek and Roman mythology with modern themes. Its graphic novel adaptation further expanded its reach, appealing to a broader audience and solidifying its place in popular culture. The book’s creative storytelling and character depth continue to inspire readers and writers alike, leaving a lasting impact on the genre.

7.1 Influence on Young Adult Fantasy

The Mark of Athena has set a new standard in young adult fantasy, blending mythology with modern themes. Its unique storytelling and character-driven narratives have inspired many authors. The book’s ability to appeal to a wide audience, including both teens and adults, has solidified its place in the genre. The graphic novel adaptation further enhanced its reach, making it a cultural phenomenon in young adult literature.

7.2 The Role of Greek and Roman Mythology

The Mark of Athena masterfully intertwines Greek and Roman mythology, creating a rich narrative. Characters like Athena and her Mark symbolize wisdom and power, while the quest elements draw from mythological themes. The book introduces readers to lesser-known myths, blending them with modern storytelling. This approach not only educates but also captivates, making mythology relatable and exciting for a new generation of readers.

7.3 The Graphic Novel Adaptation

The Mark of Athena is also available as a graphic novel, offering a visually stunning adaptation. This format brings the story to life with vibrant illustrations, capturing key moments like Annabeth’s solo quest and the Argo II’s journey. Fans praise the artwork for enhancing the narrative, making it a must-read for both new readers and longtime fans of the series. The graphic novel is widely available online, including as a PDF.

Availability and Access

The Mark of Athena is widely available online, including as a PDF, on platforms like Google Drive and Internet Archive. Some editions may have missing pages.

8.1 Reading “The Mark of Athena” Online

The Mark of Athena can be read online as a PDF, available on platforms like Google Drive and Internet Archive. Fans often share links to access the book digitally, making it convenient for readers worldwide. However, some users have reported issues with missing pages in certain editions. Ensure the PDF is complete before downloading to enjoy the full adventure of Annabeth and her companions.

8.2 PDF Versions and Download Options

PDF versions of The Mark of Athena are widely available online, with platforms like Google Drive and Internet Archive offering free downloads. The book, part of Rick Riordan’s Heroes of Olympus series, is accessible in various formats. Some editions, such as the 10th anniversary version, have reported missing pages, so verifying the file’s completeness is essential before downloading. Ensure the PDF is from a reliable source for an uninterrupted reading experience.

8.3 Legal and Ethical Considerations

Accessing The Mark of Athena as a PDF requires adherence to copyright laws. The book is copyrighted by Rick Riordan and Disney Publishing Worldwide. Downloading from unauthorized sites may infringe on these rights and is ethically questionable. Always use legal platforms or purchase the book to support the author and publisher. Unauthorized downloads can lead to legal consequences and undermine the creative work of authors and publishers.

Challenges and Controversies

Some editions of The Mark of Athena have missing pages, frustrating readers. Fans debate character treatment, like Jason’s portrayal, and speculate about plot choices. Legal issues arise with unauthorized PDF downloads, raising ethical concerns about copyright infringement and supporting authors through legitimate purchases.

9.1 Missing Pages in Some Editions

Some editions of The Mark of Athena have been reported to have missing pages, particularly pages 393-425 in the 10th anniversary set. This issue has frustrated readers, as it disrupts the story’s continuity. While most editions remain unaffected, the problem highlights the importance of verifying book quality before purchase. Affected readers are advised to contact publishers or consider digital versions to avoid incomplete stories.

9.2 Fan Theories and Speculations

Fans of The Mark of Athena have shared numerous theories and speculations online, particularly about key plot points and character arcs. Many discussed Percy and Annabeth’s reunion, the challenges of their quest, and the rivalry between Percy and Jason. Readers also speculated about the prophecy’s meaning and the role of the Doors of Death. These discussions, often shared in fan communities, highlight the book’s engaging nature and its ability to inspire creative thinking among readers.

The Mark of Athena is a captivating read, blending mythology, adventure, and character growth. Its availability as a PDF makes it accessible to fans worldwide, ensuring its enduring popularity.

Categories
Guide

wilds of eldraine quick draft guide

Wilds of Eldraine Quick Draft offers a fast-paced, balanced format with diverse strategies and fairy tale themes. It emphasizes card synergy, adaptability, and strong early-game plays, making it ideal for BO1 matches. This guide helps players master the format, covering essential tips, archetypes, and card picks to dominate their games.

Understanding the Set and Its Mechanics

Wilds of Eldraine features the return of the Adventure mechanic and introduces Roles, enchantment tokens that enhance creatures. The set blends fairy tale themes with innovative card synergies and legendary signpost creatures tied to popular tales.

2.1 Special Mechanics: Adventure and Roles

The Wilds of Eldraine set introduces two unique mechanics: Adventure and Roles. Adventure allows creatures to transform into spells when exiled, offering dual functionality. Roles are enchantment tokens that grant abilities to specific creatures, enhancing their power. These mechanics add depth to deck-building and gameplay, encouraging strategic card synergies. Adventure cards are particularly valuable as they provide versatility, while Roles enable targeted upgrades to key creatures. Understanding these mechanics is crucial for maximizing card potential and creating effective strategies during the draft. Properly leveraging Adventures and Roles can lead to powerful combos and a strong board presence, making them central to the set’s appeal.

2.2 Fairy Tale Themes and Card Synergies

Wilds of Eldraine is deeply rooted in fairy tale aesthetics, with cards inspired by classic stories like Cinderella and Snow White. This theme extends to card synergies, where specific combinations evoke narrative-driven gameplay. For example, cards like Once Upon a Time and Gingerbread Cabin set up early-game plays reminiscent of storybook beginnings. The set emphasizes interactions between creatures and spells, creating a cohesive gameplay experience. Synergies often revolve around token generation, lifelink, and adventure mechanics, rewarding players for building around thematic cores. Cards like Faerie Miscreant and Wicked Wolf highlight how creatures can enable powerful plays when paired with complementary spells. Understanding these synergies is key to drafting effectively, as they allow players to build decks that feel both flavorful and competitive. The fairy tale theme not only enhances immersion but also drives strategic deck-building decisions.

Draft Archetypes and Strategies

Wilds of Eldraine offers diverse draft archetypes, from aggressive tribal builds to controlling decks. Strategies focus on leveraging fairy tale themes, adventure mechanics, and synergies to craft cohesive, competitive decks tailored to your playstyle.

3.1 White-Blue: Fae Tricks

The White-Blue “Fae Tricks” archetype revolves around aggressive, tempo-based strategies with a focus on Faeries and disruptive spells. This deck aims to swarm the board with evasive creatures like Gadwick, the Wandering King and Fae of Wishes, while using tricks like Brinehill Pinnacle and Charming Prince to protect your threats and disrupt opponents.

  • Key cards include early-game Faeries and cheap interaction spells to maintain tempo.
  • Synergies with Adventure cards like Shepherd’s Horn and Foulwhisper News enhance card advantage.
  • Look for ways to enable flying and flash to maximize your creatures’ impact.

This archetype excels in aggressive starts and mid-game trickery, making it ideal for players who enjoy controlling the board with precise, disruptive plays.

3.2 Blue-Black: Milling Fae

The Blue-Black “Milling Fae” archetype focuses on leveraging the power of milling to fuel your advantage. This deck thrives on filling the graveyard with creatures and spells, which are then used to trigger powerful effects. Cards like Moonlit Manitou and Drown in the Loch shine in this strategy, as they synergize with the mill theme.

  • Key creatures include Fae of Wishes and Glowing-Eyes, Glimmerglow, which benefit from having cards in the graveyard.
  • Supporting spells like Into the Story and Merfolk Secretkeeper help mill while providing additional value.
  • The deck aims to create a recursive engine, where milled cards can be brought back or used for card advantage.

This archetype rewards players who enjoy a mix of mill and value generation, making it a strong choice for those who can manage their library effectively and leverage graveyard synergies.

3.3 Black-Red: Goblins and Knights

The Black-Red “Goblins and Knights” archetype is an aggressive, creature-based strategy that leverages the synergy between Goblins and Knights. This deck aims to flood the board with low-to-the-ground threats and use removal spells to clear the way for your army. Goblin Piledriver and Goblin Cadets are standout performers, providing early-game pressure and scaling into the late game. Knights like Epicure of Flesh and Order of Midnight add resilience and value to the deck.

  • The deck relies on cheap, impactful creatures to swarm the opponent.
  • Removal spells like Searing Blood and Fatal Push are crucial for maintaining tempo.
  • Sacrifice outlets and anthems can further enhance your board presence.

This archetype excels in aggressive metas and rewards players who can curve out effectively and apply consistent pressure. It’s a strong choice for those who enjoy a fast-paced, creature-centric game plan.

3.4 Red-Green: Big Creatures

The Red-Green archetype, often referred to as “Big Creatures,” focuses on dominating the board with high-powered, large-bodied monsters that can quickly end the game. This strategy relies on ramp spells and mana acceleration to cheat outsized threats into play earlier than expected. Cards like Emberwilde Captain and Wildborn Preserver exemplify this approach, offering both power and resilience.

  • Utilize ramp spells like Gilded Light or Fauna Shaman to accelerate your mana development.
  • Prioritize large, game-ending creatures that can single-handedly swing the matchup.
  • Incorporate ways to protect your investment, such as anti-removal spells or counterspells.

This archetype is particularly effective in slower, more grindy matchups where your imposing threats can take over. However, it can struggle against aggressive decks that apply early pressure. Balance is key, ensuring you have enough early-game defense while setting up your late-game powerhouses.

3.5 Green-White: Tokens and Adventures

The Green-White archetype, centered around tokens and Adventures, leverages synergies between token-generating creatures and Adventure cards to create a formidable board presence. This strategy thrives on flooding the board with small, evasive creatures and using Adventures to bolster their impact. Cards like Lys Alana Huntmaster and Revenge of the Hunted exemplify this approach, offering both token generation and powerful effects.

  • Prioritize creatures with Adventure abilities to maximize value in the early and late game.
  • Look for token-generating spells like Brass Herald or Secure the Wastes to swarm the board.
  • Incorporate anthem effects or pumps like Marshal’s Anthem to enhance your token army.

This archetype excels at creating overwhelming board states and synergies, making it difficult for opponents to keep up. It’s particularly strong in matchups where you can establish an early advantage and protect your board with removal or counterspells. Balance is key to ensure you have both early-game aggression and late-game staying power.

3.6 White-Black: Lifelink and Sacrifice

The White-Black archetype, centered around lifelink and sacrifice, combines life gain with creature sacrifice to create a resilient and aggressive strategy. This deck thrives on trading resources effectively, using sacrifice outlets to generate value while maintaining a strong board presence. Cards like Ayli, Eternal Pilgrim and Witch’s Cottage exemplify this synergy, offering lifelink and sacrifice interactions.

  • Prioritize creatures with lifelink to maintain a healthy life total and generate card advantage.
  • Incorporate sacrifice outlets like Cartel Aristocrat or Skemfar Shadowsage to generate value from your creatures.
  • Look for high-impact removal spells to protect your board and disrupt opponents.

This archetype excels at controlling the game tempo, using lifelink to stabilize and sacrifice to disrupt. It’s particularly strong in matchups where you can leverage your life total to stay ahead. Be cautious not to over-sacrifice, as this can leave you vulnerable to aggressive strategies. Balance is key to ensure long-term success in this archetype.

3.7 Black-Green: Dredge and graveyard

3.7 Black-Green: Dredge and Graveyard

The Black-Green archetype, centered around dredge and graveyard synergy, leverages the power of self-mill and recursion to fuel its strategy. This deck thrives on filling the graveyard with creatures and using dredge mechanics to recur them, creating a steady stream of threats. Cards like Carrion Feeder and Shambling Husk exemplify this approach, allowing you to sacrifice creatures to generate value or recur them for repeated use.

  • Prioritize creatures with low toughness to enable frequent sacrificing and dredge triggers.
  • Incorporate self-mill enablers like Memory Theft or Foulwhisper News to fill the graveyard quickly.
  • Look for payoff cards like Scavenging Ooze that benefit from a filled graveyard.

This archetype excels at generating card advantage through recursion, making it resilient to removal. However, it can struggle against graveyard hate, so timing your plays and protecting your strategy is crucial. Balance your deck with a mix of small creatures and larger threats to ensure consistent pressure and adaptability.

3.8 Green-Blue: Ramp and Landfall

The Green-Blue archetype focuses on ramping mana to cast powerful spells and leveraging Landfall triggers for incremental advantages. This deck thrives on accelerating mana development with creatures like Llanowar Elves or Fyndhorn Elves, enabling early access to high-impact cards. Landfall synergies are central, with creatures like Snapping Gnarlid or Earthcraft providing bonuses when lands enter the battlefield.

  • Prioritize ramp creatures and spells to accelerate mana development.
  • Focus on creatures with Landfall abilities to maximize land drops.
  • Incorporate payoff cards like Hydroid Krasis or Prime Speaker Vannifar to utilize excess mana.
  • Balanced deck construction is key, ensuring a mix of ramp, Landfall triggers, and removal.

This archetype excels at generating mana advantage and scaling into late-game threats, but requires careful timing to optimize Landfall triggers and avoid wasting mana. Proper sequencing and card selection are crucial for success.

3.9 Blue-Red: Burn and tempo

The Blue-Red archetype in Wilds of Eldraine Quick Draft focuses on aggressive strategies, combining burn spells with tempo-based creatures. This deck aims to deal direct damage to opponents while controlling the board with evasive creatures. Cards like Goblin Guide and Monastery Swiftspear shine in this archetype, leveraging cheap, impactful spells to dominate early matchups.

  • Early-game burn spells like Lightning Bolt and Searing Blaze help control the board.
  • Creatures with high power and evasion, such as Keldon Marauders, pressure opponents effectively.
  • Tempo-gaining cards like Opt and Consider ensure consistent card advantage.
  • Sacrifice outlets like Burning-Tree Emissary amplify the deck’s aggression.

This archetype excels at punishing slower decks but can struggle against heavy removal or lifegain strategies. Drafting a balanced mix of burn, creatures, and interaction is key to maximizing its potential.

3.10 Red-White: Weenie and Heroic

The Red-White archetype focuses on aggressive strategies with small creatures, often referred to as “weenies,” and utilizes the heroic mechanic to enhance their effectiveness. This deck aims to swarm the board early and grow its threats over time. Cards like Fervent Champion and Ajani’s Pridemate are staples, as they thrive with heroic triggers.

  • Creatures with low toughness but high power dominate the early game.
  • Heroic triggers from cards like Spirit of the Hearth and Ethereal Absolution provide late-game value.
  • Auras like All Right and Dauntless Strike boost creatures and activate heroic abilities.
  • Mass pump spells like Teysa Karlov can turn small creatures into threats.

This archetype excels at aggressive starts but can falter against board wipes or heavy removal. Balancing creature density with heroic enablers is crucial for success. The deck rewards players who can leverage early tempo and grow their threats consistently.

Evaluating Cards for Your Deck

Evaluate cards based on power, toughness, and mana cost. Consider synergies, removal potential, and card advantage. Prioritize cards that fit your archetype and enhance your overall strategy. Balance early-game impact with late-game relevance.

4.1 Top Commons for Each Color

Identifying the top commons for each color is crucial in Wilds of Eldraine Quick Draft. For White, cards like Inspiring Veteran and Garrison Cat provide early-game value and synergize with lifelink themes. Blue excels with Brineborn Cutthroat and Faerie Miscreant, supporting mill and flying strategies. Black relies on Rankle, Master of Pranks and Witch’s Cottage for sacrifice synergy and late-game grind. Red benefits from Torbran, Thane of Red Fell and Firedrinker Satyr, enabling aggressive starts and cost reduction. Green leverages Overwhelmed Apprentice and Llanowar Visionary for ramp and defense. These commons are versatile and often form the backbone of successful decks, ensuring consistency across drafts.

4.2 Essential Removal Spells

Removal spells are vital in Wilds of Eldraine Quick Draft, as they help control the board and disrupt opponents. For White, Banish to the Moon and Weigh Down are excellent at neutralizing threats. Blue excels with Mystical Dispute and Thief of Sanity, providing both counterspells and card advantage. Black relies on Noxious Grasp and Suffer the Slings for efficient creature removal. Red uses Flame Prophecy and Slaying Fire to deal direct damage and remove problematic permanents. Green offers Bramblefort Fink and Witch’s Cottage for synergy with sacrifice themes. These spells are often high-priority picks, ensuring you can adapt to various strategies. Prioritizing removal ensures you can protect your board and maintain tempo, making them indispensable in any successful draft deck.

4.3 Bombs and Rares to Prioritize

In Wilds of Eldraine, rare cards can often decide games due to their power and versatility. Prioritize bombs like Emergent Ultimatum in white, which offers incredible value, and The Great Henge in blue, a game-changing artifact. Black’s Gilded Light is a must-pick for its ability to disrupt opponents, while red’s Torbran, Thane of Red Fell amplifies burn spells and creature damage. In green, Nissa, Who Shakes the World dominates boards with her ability to generate massive creature tokens. Additionally, colorless cards like The Ozolith and Robber of the Rich are versatile and powerful in any deck. These rares often swing games in your favor, making them high-priority picks during the draft. Grabbing these bombs early ensures a strong foundation for your deck and puts pressure on your opponents to keep up.

Top Tips for Drafting Success

Adapt to the draft’s flow, prioritize high-impact cards, and focus on synergies. Build around your curve, signal your strategy, and manage the late game effectively. Flexibility and card quality are key.

5.1 General Drafting Tips

When drafting Wilds of Eldraine, it’s crucial to understand the set’s mechanics and themes early. Focus on picking cards that align with your chosen archetype and build around synergy. Always prioritize high-quality, versatile cards over niche or situational ones. Pay attention to the mana curve—ensuring a balance of creatures, removal, and interaction. Signal your strategy by committing to a colors early to avoid splashing. Be flexible; if the draft isn’t going as planned, pivot to a different archetype. Removal and creature spells are premium, so prioritize them highly. Avoid overvaluing rare bombs unless they directly fit your strategy. Lastly, keep an eye on the late-game potential of your deck, as many Wilds of Eldraine cards scale well into the later turns.

  • Focus on synergy and archetype alignment.
  • Prioritize high-quality, versatile cards.
  • Balance your mana curve.
  • Signal your colors early and stay committed.
  • Be flexible and adapt to the draft’s flow.
  • Value removal and creatures highly.
  • Consider late-game potential.

5.2 Pick Order Strategy

In Wilds of Eldraine Quick Draft, understanding pick order is key to building a competitive deck. Early picks should focus on rare bombs, high-impact removal spells, and creatures that define your archetype. Prioritize cards like Faerie Imposter or Order of Midnight in the first few picks, as they set the tone for your strategy. In the mid-pack, shift toward filling out your mana curve with efficient creatures and supporting spells. Pay attention to signals from other players—passing a high-quality card may indicate their archetype. Late picks should address specific needs, such as additional removal or synergy pieces. Avoid overcommitting to a single strategy too early unless you’re confident in the signals. Adaptability is crucial, as the draft’s direction can shift rapidly.

  • Early picks: Rares, removal, and archetype-defining cards.
  • Mid-pack: Fill mana curve with efficient creatures.
  • Late picks: Address gaps and synergies.
  • Read signals to adapt your strategy.

5.3 Common Mistakes to Avoid

When drafting Wilds of Eldraine, there are several common pitfalls to avoid for optimal success. One of the most frequent errors is overvaluing rare cards early in the draft, especially if they don’t fit your archetype. Players often prioritize flashy rares over consistent commons, leading to an unbalanced deck. Another mistake is taking too many colors too early, which can result in a fragmented strategy. Additionally, many drafters overlook the importance of early removal spells, leaving them vulnerable to aggressive starts. Ignoring signals from other players, such as passed cards, can also lead to missed opportunities. Avoid drafting too many high-cost creatures without adequate ramp or support. Lastly, don’t neglect the importance of card synergy—building around standalone powerful cards without a cohesive plan often backfires.

  • Overvaluing rares that don’t fit your archetype.
  • Drafting too many colors early.
  • Neglecting removal spells.
  • Ignoring draft signals.
  • Overloading on high-cost creatures without support.

5.4 Optimizing for BO1 Format

When drafting for Wilds of Eldraine in a Best-of-One (BO1) format, it’s crucial to focus on decks that can win quickly and consistently. Prioritize lower-curve decks with evasive creatures and early interaction, as games often end before the late game. Avoid over-relying on high-cost bombs or complex combos, as they may not impact the game in time. Instead, build around creatures with flying, first strike, or deathtouch to ensure a faster clock. Additionally, include a mix of removal spells and tricks to disrupt opponents’ plans. Mulligan aggressively for strong starts, as the first few turns are pivotal in BO1. Archetypes like White-Blue Fae Tricks or Red-White Weenies excel in this format due to their aggressive nature and ability to close games quickly. Always consider the archetype’s ability to race, as tempo often dictates the outcome in BO1.

Advanced Drafting Strategies

Mastering card synergy, building around powerful rares, and adapting to the draft’s flow are key. Focus on maximizing deck cohesion and leveraging overlooked cards for hidden value, ensuring flexibility in your strategy.

6.1 Card Synergies and Combos

Card synergies and combos are crucial in Wilds of Eldraine Quick Draft, as the set’s design encourages building around specific interactions. Key combos include pairing Food-generating creatures like Gilded Goose or Okta’s Advocate with cards that utilize Food, such as Goblin BBQ or Trail of Crumbs. Additionally, Adventure cards like Beanstalk Giant and Faerie Imposter offer dual-use value, making them excellent picks for synergy-focused decks.

Another powerful combo involves creatures with enters-the-battlefield effects, such as Knight of the Keep or Wicked Wolf, paired with cards like Birthing Boughs to create recursive value. Token-generating cards like Fae of Wishes and Linden, the Wayward also shine when combined with +1 counter synergies or sacrificial outlets.

Understanding these interactions allows drafters to build cohesive decks that outperform individual card power levels, making synergy a cornerstone of advanced strategies in Wilds of Eldraine.

6.2 Deck Building Tips

When constructing your deck for Wilds of Eldraine Quick Draft, focus on creating a cohesive strategy that aligns with your chosen archetype. Ensure a balanced mix of creatures and spells, aiming for a 2:1 creature-to-spell ratio. Prioritize cards with high synergy, as the set’s fairy-tale theme rewards combos and interactions. For example, pair token generators with anthems or use Adventure cards to maximize value.

Mana curve is critical; most creatures should cost 1-3 mana to maintain tempo. Include 1-2 high-impact rare or mythic bombs to close games. Removal spells are vital, so include 2-3 depending on your archetype’s needs. Lands should total 17-18, with 2-3 utility lands like Mystic Sanctuary or Foul Orchard for added flexibility.

Finally, adapt your deck to the draft’s flow. If you notice an abundance of a specific synergy, lean into it. Avoid overloading on situational cards unless your deck can consistently enable them. A well-tuned deck with clear goals will often outperform one with scattered priorities.

Drafting in Wilds of Eldraine is a captivating experience that blends fairy tale charm with strategic depth. The set’s unique mechanics, such as Adventure and Food tokens, create a dynamic environment where adaptability is key. With a wide array of archetypes, from aggressive Weenie strategies to grindy Dredge builds, players can explore diverse playstyles to suit their preferences.

Success in this format hinges on understanding card synergies, evaluating removal spells, and prioritizing high-impact rares. Drafting effectively requires balancing early picks for consistency with late-game power. Remember, practice makes perfect, and mastering the nuances of Wilds of Eldraine will elevate your drafting skills.

Ultimately, embrace the set’s whimsical themes and mechanical complexity. Whether you’re a seasoned pro or a newer player, this format offers endless opportunities for creative deck-building and thrilling gameplay. Enjoy the journey, and may your drafts be filled with magical moments and victorious matches!

Categories
Tutorials

10 step tutorial process avid

Avid Media Composer is a professional video editing system developed by Avid Technology, widely used in film and television production for its robust editing capabilities and collaborative features.

Overview of Avid Media Composer

Avid Media Composer is a professional video editing system developed by Avid Technology, widely used in film, TV, and media production. While it can be challenging to learn, proper project setup simplifies the editing process. Resources like the 101 tutorial series and a comprehensive 1470-page Editing Guide are available for mastering the software. With strong community support, including forums like the VideoEditing subreddit, users can share knowledge and improve their skills. Its advanced collaboration features make it ideal for team-based projects, ensuring seamless workflows and high-quality output.

Importance of Learning Avid for Video Editing

Mastering Avid Media Composer is essential for aspiring video editors, as it remains the industry standard in film and television production. Its robust tools and collaborative features are highly valued in professional environments. Learning Avid opens doors to career advancement, particularly for those aiming to transition from assistant roles to editor positions. With resources like the 101 tutorial series and active community support, overcoming the learning curve becomes manageable. Proficiency in Avid enhances your versatility and competitiveness in the competitive world of post-production.

Step 1: Setting Up Your Project

Starting a project in Avid Media Composer begins with setting up your workspace and configuring project parameters to ensure a smooth editing process from the start.

Creating a New Project in Avid

Starting a new project in Avid Media Composer involves launching the application, selecting a project type, and configuring essential settings. Enter a project name, choose resolution and frame rate, and specify storage locations. Proper setup ensures compatibility with your source footage and streamlines the editing process. Organizing your files and settings early on saves time and reduces errors. This step is crucial for a smooth workflow, allowing you to focus on creative editing rather than technical issues.

Setting Up Project Parameters

Configuring project parameters in Avid Media Composer ensures optimal performance and compatibility. Set resolution, frame rate, and aspect ratio to match your source footage. Choose a project format like HD or 4K and select appropriate color spaces. Designate storage locations for media and render files. Audio settings, such as sample rate and bit depth, should align with your workflow. Proper parameter setup prevents errors and ensures smooth playback. Always verify settings before importing media to avoid rework. This step is essential for maintaining consistency and quality throughout your project.

Step 2: Ingesting Your Media

Importing and organizing your footage is crucial. Use Avid’s import tools to bring in media, ensuring files are properly named and stored for easy access during editing.

Importing Footage into Avid

Importing footage into Avid Media Composer is a straightforward process that ensures your media is ready for editing. Start by selecting File > Import from the menu bar. Choose the desired files or folders, and Avid will automatically recognize and categorize them. You can also drag-and-drop media directly into the Browser window for quick ingestion. Make sure your files are properly named and organized to streamline the editing workflow. Avid supports various file formats, but it’s important to verify compatibility before importing. Once imported, your media will be accessible in the Browser, ready for use in your project.

Organizing Media in the Browser

Organizing media in the Browser is essential for efficient editing. Create folders and bins to categorize clips, such as video, audio, and graphics. Use clear, descriptive names for easy navigation. Drag-and-drop clips into bins to group related media. You can also add metadata to clips for better searchability. Use the search tool to quickly locate specific clips. Keeping your media organized saves time and ensures a smoother workflow. A well-organized Browser helps you focus on storytelling rather than searching for assets.

Step 3: Basic Editing Techniques

Mastering basic editing techniques is foundational. Learn to assemble clips and trim footage to create a cohesive narrative. Essential skills for any editor.

Adding Clips to the Timeline

Adding clips to the timeline is a core step in video editing. In Avid Media Composer, you can drag and drop clips directly from the browser to the timeline. Clips can be added to the beginning, end, or middle of the timeline by positioning the cursor where you want the clip to appear. You can also use the spindle to mark clips and automatically add them to the timeline. This process allows you to build your sequence and create a cohesive narrative. Proper placement ensures a smooth workflow and precise control over your edit.

Trimming Clips in the Timeline

Trimming clips in the timeline is essential for refining your edit. In Avid Media Composer, you can enter trim mode by pressing F or using the trim tool. This allows you to adjust the start or end of a clip by dragging its edges. The slip and slide tools enable precise adjustments without affecting the timeline’s overall length. Use ripple trims to adjust a clip while maintaining the project’s duration. Trimming ensures your clips are perfectly aligned, enhancing the pacing and flow of your sequence.

Step 4: Working with the Timeline

Mastering the timeline is central to editing in Avid. Understand its structure, navigate clips, and use tools to refine your sequence efficiently.

Understanding the Timeline Structure

In Avid Media Composer, the timeline is where you assemble your video and audio clips into a cohesive sequence. It is divided into video tracks (V1, V2, etc.) and audio tracks (A1, A2, etc.), with the video tracks located above the audio tracks. Each track can hold multiple clips, and you can add or remove tracks as needed. The timeline allows you to arrange clips in a specific order, enabling precise control over your edit. Understanding this structure is essential for effective editing and achieving your creative vision.

Navigating and Selecting Clips

Navigating the timeline in Avid Media Composer involves using tools like the mouse or keyboard shortcuts to move through your project. To select clips, simply click on them. For precise adjustments, use the Slip (S) and Slide (B) tools to reposition or adjust clip lengths. Use the Zoom (Z) tool to focus on specific areas. Keyboard shortcuts like L for loop playback simplify navigation. Selected clips are highlighted, and their handles appear in yellow and blue for trimming. Mastering these techniques ensures efficient editing and precise control over your sequence.

Step 5: Advanced Editing Techniques

Master advanced editing techniques to enhance your storytelling. Learn multi-camera workflows, J-cuts, and L-cuts to create seamless transitions and dynamic pacing in your sequences.

Multi-Camera Editing in Avid

Multi-camera editing in Avid allows you to work with footage from multiple cameras synced by timecode or in/out points. This feature is ideal for interviews, concerts, or scenes shot with several angles. To access multi-camera editing, select the clips in the bin, right-click, and choose Multi-Camera > Sync. A new multi-camera clip is created, enabling seamless switching between angles in the timeline. This workflow streamlines editing, ensuring a polished and professional final product while maintaining visual continuity and dynamic pacing in your sequences.

Using J-Cuts and L-Cuts

J-cuts and L-cuts are essential techniques for creating smooth transitions between clips. A J-cut involves bringing the audio of the next clip in before the video cuts, while an L-cut extends the video of the current clip beyond the audio cut. In Avid, these can be achieved by slipping clips or using the Source and Record monitors. These methods enhance storytelling by maintaining visual or audio continuity, ensuring a seamless flow during transitions and keeping the audience engaged with the narrative or emotional tone of the sequence.

Step 6: Adding Transitions and Effects

Enhance your edit with transitions and effects to create polished visuals. Use dissolve, fade, or slide transitions between clips for smooth scene changes. Apply effects from the Effect Palette to add depth or correct elements. Experiment with motion effects, color corrections, or text overlays to elevate your narrative and maintain viewer engagement throughout the sequence.

Applying Transitions Between Clips

In Avid Media Composer, transitions are applied to smooth out cuts between clips. Open the Effect Palette to browse available transitions like dissolve, fade, or slide. Drag and drop a transition onto the cut point in the timeline. Adjust the duration by dragging the edge or using the Effect Mode window. Preview the transition in the Preview Monitor to ensure it matches your desired style. Use transitions sparingly to maintain pacing and focus, ensuring they enhance the narrative without distracting the audience.

Using Effects in the Effect Palette

Avid’s Effect Palette offers a wide range of effects to enhance your edit. Browse categories like Color Correction, Blur, and Text. Drag and drop an effect onto a clip or the timeline to apply it. Use the Effect Mode to adjust parameters and keyframe animations. Effects can be layered for complex looks. Render effects to preview smoothly. Experiment with presets or create custom effects to achieve your vision, ensuring they align with your project’s aesthetic and storytelling goals.

Step 7: Audio Editing Basics

Avid’s audio tools enable precise sound control. Adjust levels, sync audio with video, and use rubber-banding for automation. The Audio Suite offers advanced editing features for clear, balanced sound.

Adjusting Audio Levels

Adjusting audio levels is crucial for ensuring clear and balanced sound. In Avid, use the Audio Meter to monitor levels in real-time. To adjust levels, select clips in the timeline and use the Audio Gain tool to increase or decrease volume. You can also use the rubber-banding feature to automate level changes over time. For precise control, access the Audio Suite tools, which allow you to normalize levels, reduce noise, and fine-tune your mix. Proper level adjustment enhances the overall audio quality and ensures a professional-sounding edit.

Syncing Audio with Video

Syncing audio with video ensures that sound and visuals align perfectly. In Avid, you can automatically sync clips by using timecode or ingest settings. If timecode isn’t available, manually sync by marking in and out points in the Source and Record monitors. Use the Slip and Slide tools to fine-tune sync without moving clips. For multicam setups, Avid’s AutoSync feature streamlines syncing across multiple angles. Proper syncing is vital for maintaining a seamless and professional edit.

Step 8: Color Correction and Grading

Enhance your project’s visual appeal by adjusting color balance and contrast. Use Avid’s Color Palette for precise corrections and LUTs for consistent grading, ensuring a polished look.

Using the Color Palette

Avid’s Color Palette offers powerful tools for precise color correction. Adjust brightness, contrast, and color balance to enhance your footage. Use the wheels and curves for fine-tuned adjustments. The real-time preview allows you to see changes instantly. Access advanced features like hue vs. hue and luma vs. chroma for detailed corrections. Save time with keyboard shortcuts for quick adjustments. Apply consistent looks across clips by saving settings as presets. This tool is essential for achieving professional-grade color correction and maintaining visual coherence in your project. Mastering the Color Palette elevates your editing to the next level.

Applying LUTs for Color Grading

LUTs (Look-Up Tables) are files that transform color and contrast to achieve specific visual styles. In Avid, you can import LUTs into the Color Palette to apply consistent looks across your project. Use the Effect Palette to add LUTs to clips or entire sequences. This ensures a uniform aesthetic, whether matching footage to a camera’s profile or creating a cinematic feel. Experiment with different LUTs to enhance mood and visual storytelling. Avid’s LUT support streamlines color grading, saving time while delivering professional results. This feature is invaluable for maintaining creative consistency in your edits.

Step 9: Collaboration and Sharing

Avid’s collaboration tools enable seamless teamwork, allowing editors to share projects and media efficiently. Features like shared storage and version control facilitate organized workflows and effective communication among team members.

Exporting Your Project

In Avid Media Composer, exporting your project is a straightforward process that ensures your final edit is delivered in the desired format. To export, navigate to File > Export and select the appropriate settings. Choose from formats like HD, 4K, or custom resolutions. You can also specify codecs, bitrate, and frame rate. Ensure the destination folder is selected and optionally add metadata. Once configured, click Export to begin rendering. Avid provides preview options to verify quality before finalizing the output, ensuring your project meets professional standards.

Sharing Media with Team Members

Avid Media Composer simplifies collaboration by enabling easy sharing of media and projects with team members. Use MediaCentral to share assets securely across your network. You can export specific clips or entire projects in standardized formats for seamless access. Sharing media via cloud storage or shared drives is also supported, ensuring team members can access files from any location. Avid’s collaborative tools allow real-time feedback and version control, enhancing productivity and ensuring everyone stays aligned throughout the post-production process.

Step 10: Final Review and Export

In the final step, review your project for accuracy and consistency. Export your work using Avid’s optimized settings and recommended formats for delivery.

Reviewing Your Final Edit

Once your project is complete, conduct a thorough review of your final edit. Check the timeline for continuity, ensuring clips flow smoothly and align with your creative vision. Verify that all transitions, effects, and audio levels are polished and meet your standards. Pay attention to pacing, making sure the narrative or message is clear and engaging. Use playback controls to review sections in real-time, and loop problem areas for precise adjustments. This step ensures your project is cohesive, professional, and ready for final export.

Exporting the Final Project

Exporting your final project in Avid Media Composer is the last step before sharing your work. Select the desired file format, resolution, and codec based on your delivery requirements. Common formats include MP4, MOV, and DNxHD. Choose the appropriate preset for platforms like YouTube, Vimeo, or Blu-ray. Ensure metadata is included for organization. Render the project in proxy or high-resolution, depending on your needs. Designate a destination folder and confirm the file name. Avid will process the export, showing a progress bar. Once complete, review the exported file to ensure accuracy and quality before sharing.

Mastering Avid Media Composer through these 10 steps enables you to create professional video content. This guide covers essentials from setup to export, ensuring polished results. Regular practice will refine your skills and unlock your full creative potential.

This 10-step tutorial provides a comprehensive guide to mastering Avid Media Composer. Starting with project setup and media ingestion, it progresses through basic and advanced editing techniques, transitions, audio adjustments, color correction, and collaboration tools. Each step builds on the previous one, ensuring a smooth learning curve. The process culminates in final review and export, equipping users with the skills to deliver high-quality video projects. By following these steps, editors can efficiently navigate Avid’s interface and produce professional-grade content with confidence.

Next Steps for Mastering Avid Media Composer

After completing the 10-step tutorial, focus on refining your skills through hands-on practice and exploring advanced features like ScriptSync, PhraseFind, and multi-camera editing. Experiment with complex workflows, such as integrating with Pro Tools for advanced audio post-production. Join Avid user communities and attend webinars to stay updated on new features. Consider pursuing Avid certification to validate your expertise. Collaborate on real-world projects to apply your knowledge and adapt to diverse editing styles. Continuous learning and practice are key to mastering Avid Media Composer and staying competitive in the industry.

Categories
Guide

usps exam 955 study guide

The USPS Exam 955 is a critical assessment for postal service positions, evaluating accuracy, attention to detail, and customer service skills, essential for a successful postal career.

1.1. What is the USPS Exam 955?

The USPS Exam 955 is a standardized assessment used by the United States Postal Service to evaluate candidates for various entry-level positions. It focuses on testing skills such as address checking, ZIP code knowledge, and customer service scenarios. The exam is designed to ensure applicants possess the necessary abilities to perform postal duties effectively. It typically consists of multiple-choice questions and is administered as part of the hiring process for roles like Postal Support Technician and other related positions. Passing the exam is a critical step toward qualifying for these positions within the USPS.

1.2. Purpose of the Exam

The USPS Exam 955 is designed to evaluate candidates’ aptitude for postal service roles, ensuring they possess the necessary skills for accurate and efficient job performance. The exam assesses attention to detail, problem-solving abilities, and understanding of postal procedures. Its primary goal is to identify individuals capable of handling mail processing, customer interactions, and operational tasks effectively. By measuring these competencies, the exam helps the USPS select qualified candidates for positions like Postal Support Technician. It serves as a critical tool in maintaining high standards of service and operational excellence within the organization.

1.3. Importance of Preparing for the Exam

Preparing for the USPS Exam 955 is crucial for achieving a high score and increasing chances of securing a postal service position. The exam is highly competitive, and thorough preparation ensures familiarity with the format, question types, and content. It helps build confidence, improves time management, and enhances problem-solving skills. Without proper preparation, candidates may struggle with the exam’s complexity, leading to lower scores. Effective preparation also highlights strengths and areas needing improvement, allowing for targeted study. Ultimately, preparation is key to performing well and advancing in the hiring process for a rewarding career with the USPS.

Understanding the Exam Format

The USPS Exam 955 features multiple-choice questions, address checking, and ZIP code knowledge assessments. Familiarizing yourself with the format aids in strategic preparation and confident performance.

2.1. Structure of the Exam

The USPS Exam 955 is a multiple-choice exam divided into sections: address checking, ZIP code knowledge, forms completion, and customer service scenarios. Each section evaluates specific skills, such as accuracy, attention to detail, and problem-solving. The exam includes a set number of questions with a predefined time limit. Understanding the structure helps candidates allocate study time effectively. Familiarizing yourself with the format ensures you navigate the test confidently. Proper preparation for each section improves overall performance and readiness for the challenges of a postal service role. Knowing the exam structure is key to strategic studying and achieving success.

2.2. Types of Questions and Timing

The USPS Exam 955 features multiple-choice questions that test address checking, ZIP code knowledge, forms completion, and customer service skills. Questions are designed to assess accuracy and efficiency. The exam typically includes a set number of questions, such as 60, with a time limit of approximately 60 minutes. This allows about one minute per question, though some may require more attention. Timing is crucial, as it simulates real-world scenarios where postal workers must process tasks quickly. Practicing under timed conditions helps build speed and confidence, ensuring candidates are prepared for the exam’s demands.

Key Sections of the USPS Exam 955

The exam focuses on three main areas: address checking and ZIP code knowledge, forms completion, and coding/sorting techniques. Each section evaluates essential skills for postal roles, such as accuracy, efficiency, and problem-solving. Address checking tests attention to detail, while forms completion assesses understanding of postal procedures. Coding and sorting require logical thinking and organizational abilities. Mastery of these sections is crucial for success in postal operations, ensuring effective mail processing and customer satisfaction. These areas are fundamental to a career in the USPS, making them central to the exam’s design.

3.1. Address Checking and ZIP Code Knowledge

The USPS Exam 955 heavily emphasizes address checking and ZIP code knowledge, as accurate mail sorting is critical to postal operations. Questions will test your ability to verify ZIP codes, identify errors in addresses, and correct them. This section evaluates your understanding of USPS addressing standards and ability to apply them under time pressure. Familiarity with ZIP code regions and common address formats is essential. Practice memorizing ZIP codes for frequently mailed areas and studying address correction guidelines will improve your performance. This section is a cornerstone of the exam, directly impacting your score and eligibility for postal roles.

3.2. Forms Completion and Customer Service Scenarios

This section assesses your ability to accurately complete USPS forms and handle customer service scenarios. Questions will present real-life situations requiring knowledge of USPS policies and procedures. You’ll need to demonstrate attention to detail when filling out forms like shipping labels and customs declarations. Customer service scenarios test your problem-solving skills and professionalism in resolving issues. Practice with sample forms and role-playing exercises can enhance your performance. Understanding USPS regulations and maintaining composure under pressure are key to excelling in this section, which evaluates your readiness to interact with customers and manage postal transactions effectively.

3.3. Coding and Sorting Techniques

This section evaluates your understanding of USPS coding systems and your ability to sort mail efficiently. Questions will test your knowledge of ZIP codes, barcodes, and sorting categories. Accurate coding ensures timely delivery, making this skill critical for postal operations. You’ll need to identify correct codes and demonstrate effective sorting methods. Practice with sample codes and sorting exercises can improve your speed and accuracy. Understanding the logic behind USPS coding systems is essential for success. Regular practice and attention to detail will help you master this section and perform well on the exam.

Preparation Strategies

Effective preparation involves creating a study plan, utilizing official USPS study guides, and practicing with sample questions. Focus on understanding exam formats and improving time management skills.

4.1. Initial Preparation Steps

4.2. Study Materials and Resources

Utilize official USPS study guides and practice exams for authentic test preparation. Supplement with workbooks and online courses tailored to Exam 955. Flashcards can aid in memorizing ZIP codes and postal terms. Review postal handbooks and manuals for detailed procedures. Join online forums or study groups for tips and shared experiences. Use mobile apps for on-the-go practice. Prioritize materials that align with the exam format and content. Cross-reference multiple sources to reinforce learning. Invest in resources that provide clear explanations and practical exercises to build confidence and competence.

4.3. Practice Tests and Mock Exams

Practice tests and mock exams are essential for mastering the USPS Exam 955. They simulate real exam conditions, helping you assess your strengths and weaknesses. Regularly take timed practice tests to improve speed and accuracy. Review your scores to identify areas needing attention. Mock exams mirror the actual test format, familiarizing you with question types and reducing exam-day anxiety. Use official USPS practice materials or reputable third-party resources. Analyze your mistakes to refine your strategies and build confidence. Consistent practice ensures readiness and enhances your ability to perform optimally during the actual exam.

4.4. Time Management Techniques

Effective time management is crucial for success on the USPS Exam 955; Allocate your study time wisely, focusing on weaker areas first. During practice tests, strictly adhere to the exam’s time limits to build speed and accuracy. Prioritize questions you’re confident about and return to challenging ones later. Use a timer during practice sessions to simulate real conditions. Break down study sessions into manageable intervals to maintain focus. Develop a strategic approach to answer questions efficiently, ensuring you complete the exam within the allotted time while maintaining accuracy and composure.

Address Checking and ZIP Code Mastery

Mastery of address checking and ZIP code knowledge is vital for the USPS Exam 955, ensuring accuracy in mail sorting and delivery processes nationwide.

5.1. Tips for Memorizing ZIP Codes

Memorizing ZIP codes effectively requires strategic techniques. Use mnemonics or associations to link codes with regions or landmarks. Group codes into pairs or triplets for easier recall. Study maps to visualize geographical patterns, aiding memory retention. Create flashcards or lists, focusing on high-frequency codes first. Practice regularly, using repetition to reinforce knowledge. Test yourself with mock exercises to identify weak areas. Prioritize codes relevant to your region for practical application. Combine visual and auditory learning methods for better retention. Consistent practice and organized study habits are key to mastering ZIP codes for the USPS Exam 955.

5.2. Common Mistakes to Avoid

Common mistakes during ZIP code memorization include rushing through study sessions, leading to poor retention. Overlooking regional patterns and failing to practice consistently can hinder progress. Misreading or mishearing codes during practice is another pitfall. Neglecting to review frequently confused codes increases error risks. Additionally, some candidates focus too much on rare codes, ignoring high-frequency ones. Procrastination and inadequate timed practice can lead to exam stress. To avoid these mistakes, adopt a structured study plan, focus on common codes, and regularly test your knowledge under timed conditions to build confidence and accuracy for the USPS Exam 955.

Forms Completion and Customer Service

Mastering USPS forms and customer service scenarios ensures efficiency and positive interactions. Focus on understanding form requirements and applying practical skills to resolve customer inquiries effectively and politely.

6.1; Understanding USPS Forms

USPS forms are essential for various postal services, requiring precise completion. Familiarize yourself with common forms like PS Form 2976 (Customs Declaration) and PS Form 1520 (Certificate of Mailing). Pay attention to required details such as sender and recipient information, package type, and special services. Practice completing forms accurately, ensuring all fields are filled correctly to avoid delays. Review the USPS Domestic Mail Manual for specific instructions. Regular practice with sample forms will enhance your speed and accuracy, reducing errors during the exam or on the job.

6.2. Handling Customer Service Scenarios

Customer service scenarios on the USPS Exam 955 test your ability to resolve common issues professionally. Practice addressing complaints, such as lost packages or delayed deliveries, with empathy and solutions. Understand policies on refunds, shipping options, and tracking. Role-play different situations to improve your response skills. Stay calm and polite, even in challenging scenarios. Review USPS guidelines to provide accurate information. Effective communication and problem-solving are key to scoring well in this section. Regular practice with mock scenarios will build confidence and ensure you handle real-life situations efficiently.

Coding and Sorting Techniques

Coding and sorting techniques are essential for USPS efficiency, ensuring mail is processed and delivered accurately. Mastering these methods enhances productivity and customer satisfaction significantly.

7.1. Basics of USPS Coding Systems

The USPS coding systems are designed to streamline mail processing and delivery. The foundation includes ZIP codes, ZIP+4 codes, and other specialized codes. ZIP codes divide the country into regions, while ZIP+4 codes further pinpoint locations. Additional codes, such as package barcodes and sorting tags, enhance automation. Understanding these coding systems is crucial for efficient sorting and delivery. Mastery of these basics ensures accuracy in mail handling and preparation. Familiarity with coding systems is a key skill assessed in the USPS Exam 955, directly impacting job performance and exam success.

7.2. Efficient Sorting Practices

Efficient sorting practices are vital for streamlining mail processing. Start by understanding the destination ZIP codes and organizing mail by region. Use scanning tools to quickly identify labels and categorize packages. Batch sorting by priority, weight, and delivery type minimizes delays. Regularly review and adjust sorting strategies to adapt to volume changes. Pay attention to special handling requirements, such as fragile or express items. Staying organized and focused ensures accurate and timely delivery. Mastering these techniques improves workflow efficiency and reduces errors, directly impacting exam performance and real-world job effectiveness. Continuous practice enhances speed and precision in sorting tasks.

Additional Tips for Success

Stay calm and focused during the exam to maintain clarity. Practice consistently to build confidence and accuracy. Review mistakes to avoid repeating them. Stay organized, manage time wisely, and ensure a good rest before the exam for optimal performance.

8.1. Staying Calm and Focused During the Exam

Staying calm and focused is crucial for performing well on the USPS Exam 955. Begin by taking deep breaths to reduce anxiety. Positive affirmations can help build confidence. Avoid rushing through questions; instead, pace yourself to ensure accuracy. Manage your time wisely, allocating equal attention to each section. Skim through the exam first to gauge difficulty and prioritize questions you’re confident about. Avoid second-guessing your answers, as this wastes time and increases stress. Take short breaks between sections if needed, but stay within the allotted time. Remember, preparation is key, so trust your skills and stay composed for optimal performance.

8.2. Continuous Practice and Improvement

Continuous practice is essential to excel on the USPS Exam 955. Regularly reviewing study materials and taking practice tests helps identify weak areas and build confidence. Analyze mistakes to avoid repeating them and focus on improving accuracy and speed. Use official resources and guides to refine your skills, especially in ZIP code memorization and form completion. Set aside time daily to practice, even briefly, to maintain momentum. Track your progress to stay motivated and adjust your study plan as needed. Consistent effort will sharpen your abilities and ensure you’re well-prepared for the exam.

Final Thoughts and Next Steps

Stay confident, review your study plan, and remain focused. After the exam, await results and prepare for the next steps in your postal career journey.

9.1. Reviewing Your Study Plan

Regularly reviewing your study plan ensures you stay on track and identify areas needing improvement. Assess completed topics, adjust time allocations, and focus on weaknesses. Consistency is key to mastering USPS Exam 955 content. Use checklists to monitor progress and celebrate milestones. Adjusting your strategy based on practice test results can significantly boost your performance. A well-organized plan keeps you motivated and prepared for exam day. Make sure to allocate time for final reviews and relaxation to maintain a clear mind. Stay disciplined and committed to your goals.

9.2. What to Expect After the Exam

After completing the USPS Exam 955, you will receive your results, indicating whether you passed or need to retake the exam. If successful, you will be placed on a hiring list for available postal positions. Be prepared for further steps, such as background checks, interviews, or orientation. If you didn’t pass, review your results to identify weak areas and consider retaking the exam after additional preparation. Stay proactive and maintain communication with your local USPS office for updates on your application status and potential next steps in the hiring process.