Brother LS-2125i Instruction Manual: A Comprehensive Guide
This manual provides detailed guidance for operating and maintaining your Brother LS-2125i sewing machine. It covers setup, threading, basic operations,
and troubleshooting, ensuring a smooth sewing experience.
Welcome to the world of sewing with the Brother LS-2125i, a basic sewing and mending machine designed for both beginners and experienced users. This machine is perfect for a variety of projects, including basic alterations, crafting, and simple home décor. Its lightweight and portable design makes it easy to take to classes or store when not in use;
This instruction manual serves as your comprehensive guide to understanding and utilizing all the features of your LS-2125i. We will walk you through each step, from initial setup and threading to performing basic sewing operations and essential maintenance. Whether you’re a seasoned seamstress or just starting your sewing journey, this manual will empower you to create with confidence.
The LS-2125i is known for its ease of use and reliability. It’s a fantastic machine for a young learner, like an 11-year-old, or anyone seeking a straightforward sewing solution. Remember to always prioritize safety when operating your machine, as outlined in the included safety precautions.
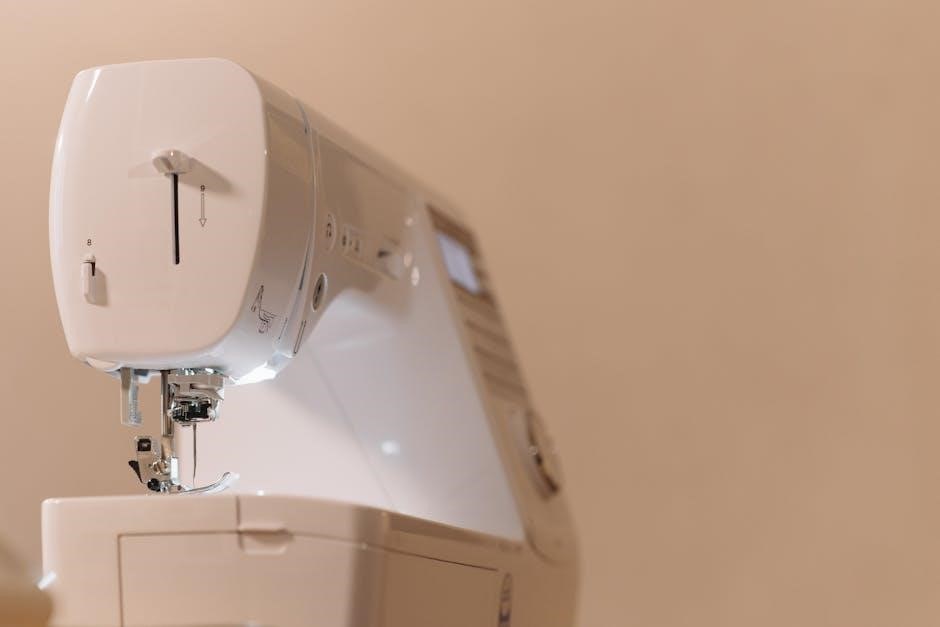
Machine Overview and Features
The Brother LS-2125i is a mechanical, basic sewing machine offering essential features for everyday sewing needs. It boasts a selection of stitch patterns suitable for mending, crafting, and simple garment construction. This machine is designed with user-friendliness in mind, featuring straightforward controls for stitch length and width adjustments.
Key features include a lightweight construction, enhancing portability for classes or storage. The machine accommodates standard accessories, such as replacement presser feet (Part Number: 138135-122) and a presser foot holder screw (Part Code: 132730-122), readily available through authorized dealers.
While it doesn’t offer advanced computerized functions, the LS-2125i excels at fundamental sewing tasks. It’s ideal for beginners learning the basics and for those who prefer a simple, reliable machine. Its robust design ensures durability, making it a dependable companion for various sewing projects. Explore the included manual for detailed information on each feature and its application.
Setting Up Your LS-2125i
Proper setup is crucial for optimal performance. This section details unboxing, powering on, and initial machine preparation, ensuring a seamless start to your sewing journey.
Unboxing and Initial Inspection
Carefully remove your Brother LS-2125i sewing machine from its packaging. Retain the box and packing materials for potential future transport or storage. Begin by inspecting the machine for any visible signs of damage that may have occurred during shipping.
Verify that all included accessories are present. These typically include the power cord, foot controller, a set of needles, bobbins, a screwdriver, and various presser feet. Consult the included parts list to confirm everything is accounted for.
Check the machine’s exterior for scratches, dents, or loose parts. Ensure the handwheel moves freely and that all covers and panels are securely attached. If you notice any damage or missing components, immediately contact your authorized Brother dealer or customer support. Do not attempt to operate a damaged machine. A thorough initial inspection will prevent issues later.
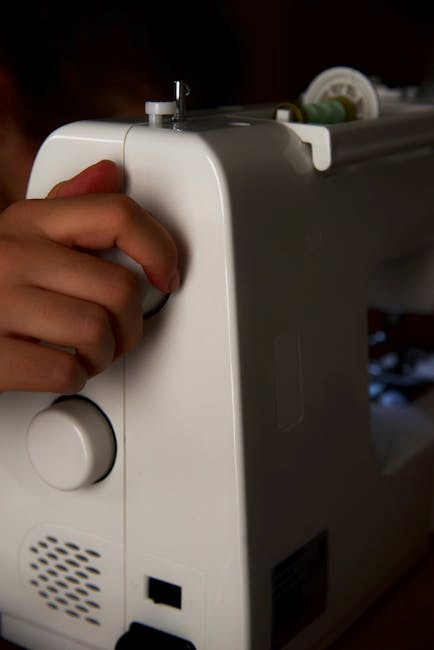
Powering On and Basic Controls
To power on your Brother LS-2125i, connect the power cord to the machine and a grounded electrical outlet. Ensure the power switch is in the “OFF” position before plugging in. Then, flip the power switch to “ON”. The machine is designed to be lightweight and portable, making it easy to use.
Familiarize yourself with the basic controls. The power switch, foot controller, and handwheel are essential for operation. The foot controller regulates sewing speed – gentle pressure for slow sewing, increased pressure for faster sewing. The handwheel allows for manual control and precise stitch placement.
Observe the stitch selection dial and practice rotating it to view the available stitch patterns. The stitch length and width dials adjust the characteristics of your chosen stitch. Understanding these controls is the first step to mastering your new machine and enjoying basic sewing, mending, crafting, and scrapbooking projects.
Installing the Bobbin
Proper bobbin installation is crucial for successful sewing with your Brother LS-2125i. Begin by ensuring the machine is powered off. Locate the bobbin case cover on the underside of the machine and open it. The bobbin is inserted into the bobbin case, a horizontal system for this model.
Follow the diagram printed on the machine to correctly orient the bobbin. Ensure the thread unwinds in the correct direction – typically counter-clockwise. Gently place the bobbin into the case and guide the thread through the tension slot. A slight click confirms proper seating.
Close the bobbin case cover securely. Draw up a few inches of bobbin thread through the opening. This initial thread is essential for forming the stitch. Incorrect bobbin installation can lead to thread bunching or skipped stitches, so double-check your work before starting to sew.
Bobbin Winding Procedure
Winding the bobbin correctly is essential for consistent stitch quality on your Brother LS-2125i. First, place the spool of thread onto the spool pin. Guide the thread from the spool through the thread guide, and then around the bobbin several times. Ensure the thread is securely wrapped.
Next, insert the bobbin onto the bobbin winder spindle. Push the bobbin winder spindle to the right to engage it. Press the foot pedal gently to start the winding process. The machine will automatically stop when the bobbin is full.
Once full, disengage the bobbin winder by pushing the spindle back to the left. Remove the bobbin and trim the thread. It’s important to wind the bobbin evenly to prevent uneven tension during sewing. Avoid overfilling the bobbin, as this can cause issues with the machine’s operation.
Inserting the Bobbin into the Case
Proper bobbin insertion is crucial for the Brother LS-2125i to function correctly. Locate the bobbin case on the underside of the machine. Gently pull out the bobbin case. Hold the bobbin with the thread unwinding in a clockwise direction.
Insert the bobbin into the bobbin case, ensuring the thread flows smoothly. Guide the thread through the tension spring of the bobbin case. You should feel a slight resistance as the thread passes through. Then, reinsert the bobbin case back into its compartment until it clicks into place.
Finally, draw up the bobbin thread by gently holding the upper thread and turning the handwheel towards you. This will bring the bobbin thread up through the needle plate. Correct bobbin insertion prevents thread bunching and ensures even stitches.
Threading the Machine
Correct threading is essential for optimal performance. This section details the upper and lower threading guides, culminating in successfully threading the needle for seamless sewing.
Upper Threading Guide
Begin by raising the presser foot; this action opens the tension discs, allowing the thread to seat correctly. Next, place the spool of thread onto the spool pin, ensuring it unwinds smoothly. Guide the thread through the first thread guide, located on the top of the machine.
Then, carefully wind the thread around the tension disc, ensuring it’s securely positioned between the discs. Continue threading through the take-up lever – this component is crucial for consistent stitch formation. After the take-up lever, guide the thread back down through another thread guide.
Finally, thread the needle from front to back. A needle threader can be incredibly helpful for this step, especially for those with limited dexterity or vision. Double-check that the thread is fully inserted into the needle’s eye. Proper upper threading is vital for preventing skipped stitches and ensuring a beautiful, even seam.
Lower Threading Guide
Start by ensuring the machine is powered off and the presser foot is raised. Locate the bobbin winder mechanism; this is where you’ll prepare the bobbin with thread. Following the manual’s diagram, wind the thread around the bobbin several times, then engage the bobbin winder.
Once the bobbin is fully wound, disengage the winder and carefully insert the bobbin into the bobbin case. Ensure the thread unwinds in the correct direction, as indicated by the arrows on the machine. Guide the thread through the tension spring of the bobbin case, ensuring it’s securely seated.
Finally, lead the bobbin thread up through the designated slot or hole in the needle plate. Gently pull the thread to bring up a loop, then use a needle to grasp and pull the loop through, leaving a tail of thread under the presser foot; Correct lower threading is essential for creating a balanced stitch.
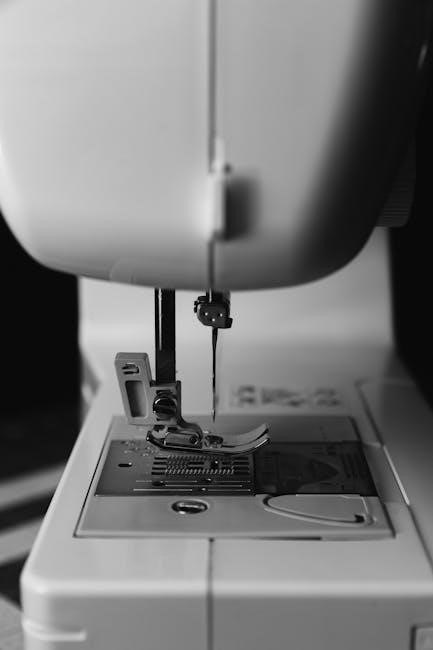
Threading the Needle
With the upper thread correctly guided through all preceding guides, proceed to the needle threading stage. Raise the needle to its highest position using the handwheel; this creates ample space for threading. Locate the needle clamp screw and ensure it’s loosened slightly to allow the thread to pass easily.
Depending on your machine’s model, you may utilize the built-in needle threader. If available, follow the manual’s instructions to engage the threader and guide the thread through the needle’s eye. If threading manually, cut the thread at a slight angle for easier insertion.
Carefully pass the thread through the needle’s eye, pulling a sufficient length through – approximately 3-4 inches. Tighten the needle clamp screw to secure the needle. Finally, draw the thread through the loop created by the lower thread, preparing for sewing. Proper needle threading is crucial for preventing skipped stitches.
Basic Sewing Operations
Mastering fundamental techniques is key to successful sewing. This section details stitch selection, length/width adjustments, starting/stopping procedures, and utilizing reverse stitching effectively.
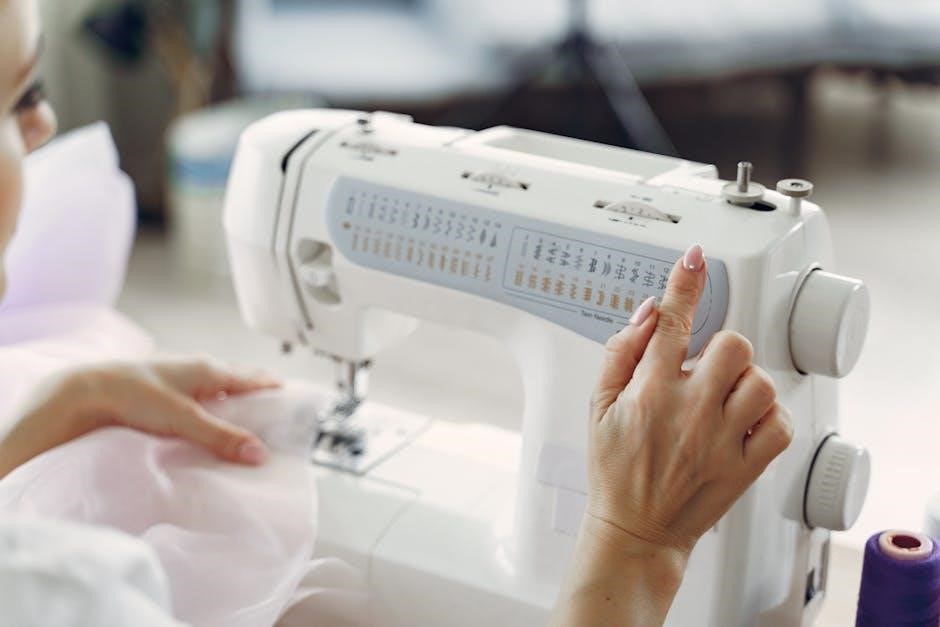
Selecting Stitch Patterns
The Brother LS-2125i offers a variety of stitch patterns suitable for diverse sewing projects, ranging from basic straight stitches for everyday mending to more decorative options for crafting. To select a stitch, locate the stitch selection dial, typically positioned on the front of the machine. This dial features a range of numbered stitch options.
Carefully rotate the dial to align the desired stitch number with the indicator mark. Common stitches include straight stitch (for seams), zigzag stitch (for finishing raw edges and stretch fabrics), and buttonhole stitch (for creating buttonholes). Refer to the stitch diagram printed on the machine itself, or within the full instruction manual, to visualize each stitch pattern.
Experiment with different stitches on scrap fabric to understand their unique characteristics and applications. Understanding the purpose of each stitch will greatly enhance your sewing capabilities and allow you to tackle a wider range of projects with confidence. Remember to adjust stitch length and width as needed for optimal results.
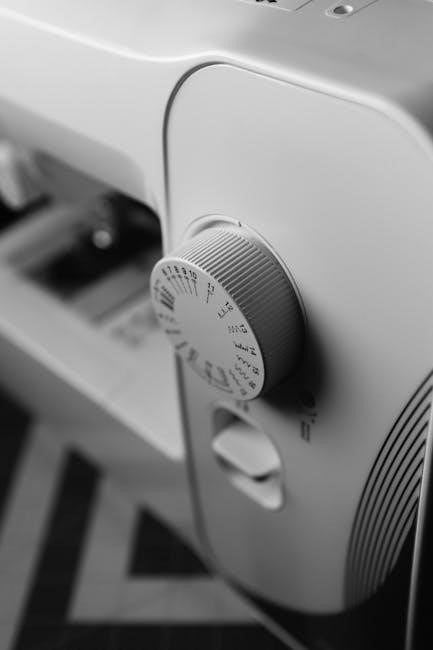
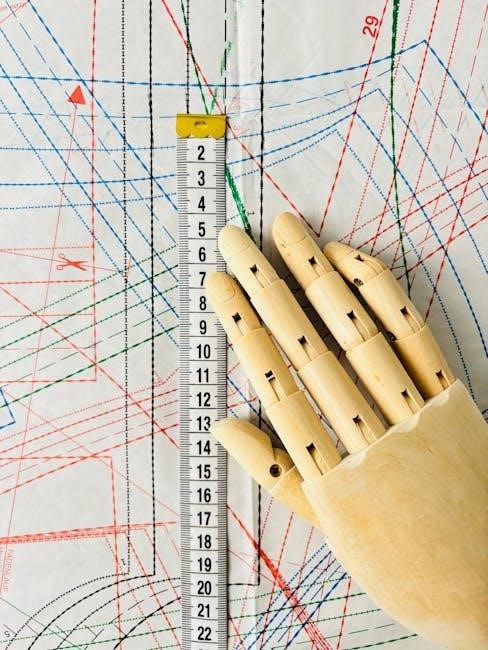
Adjusting Stitch Length and Width
Precise control over stitch length and width is crucial for achieving professional-looking results with your Brother LS-2125i. The stitch length dial, usually located near the stitch selection dial, allows you to modify the length of each stitch. A shorter stitch length is ideal for delicate fabrics and intricate details, while a longer length is suitable for heavier materials and quicker sewing.
The stitch width dial controls the width of zigzag stitches and other decorative patterns. Increasing the width creates a broader stitch, useful for securing edges and adding embellishments. Conversely, a narrower width is appropriate for subtle zigzag applications. Always test your settings on scrap fabric before sewing your final project.
Experimentation is key to finding the optimal settings for different fabrics and desired effects. Refer to the manual for recommended settings as a starting point, but don’t hesitate to adjust based on your specific needs. Proper stitch length and width contribute significantly to the durability and aesthetic appeal of your finished work.
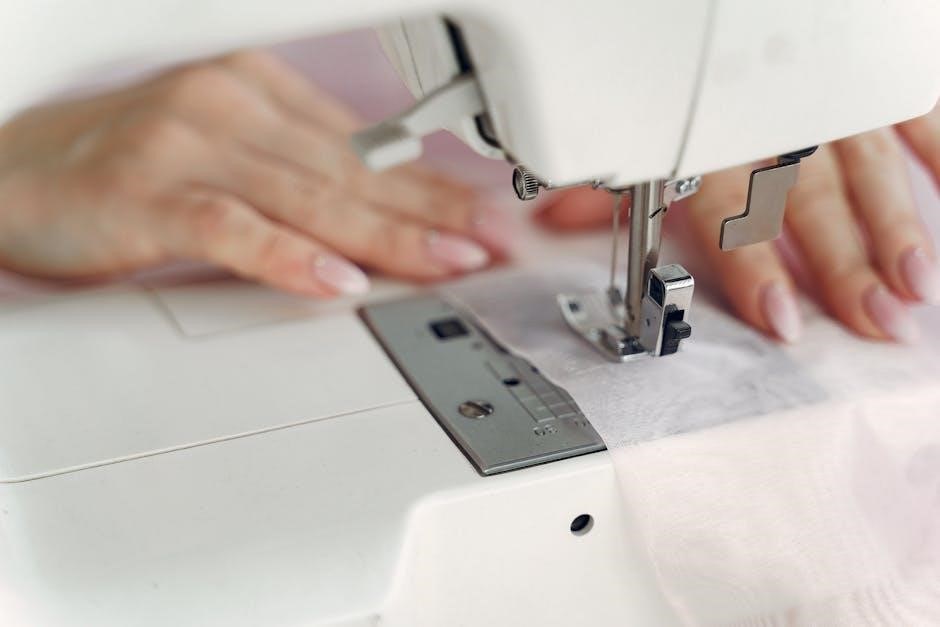
Starting and Stopping Sewing
Initiating the sewing process on your Brother LS-2125i is straightforward. Ensure your fabric is positioned correctly under the presser foot, with the needle inserted at the desired starting point. Gently depress the foot pedal to begin sewing at a slow, controlled speed. Maintaining a consistent pace is vital for achieving even stitches.
To stop sewing, lift your foot off the foot pedal. This immediately halts the needle’s movement. It’s crucial not to pull the fabric while the needle is down, as this can cause damage to the machine or fabric. Always lift the presser foot before maneuvering the fabric, allowing for free movement.
For precise control, especially when navigating corners or curves, sew slowly and deliberately. Practice starting and stopping smoothly to develop muscle memory. Remember to always finish sewing with a backstitch (reverse stitch) to secure the seam and prevent unraveling. This simple technique ensures the longevity of your projects.
Reverse Sewing (Backstitching)
Backstitching is a fundamental technique used to secure the beginning and end of a seam, preventing unraveling. On your Brother LS-2125i, engage the reverse lever – typically located on the side of the machine – to activate backstitching. This lever shifts the machine into reverse mode.
Begin sewing forward for the desired seam length, then depress the reverse lever and sew backwards over the last few stitches. Repeat this process a couple of times to firmly anchor the seam. Release the reverse lever to return to forward sewing.
Consistent backstitching is key to a durable finish. Avoid excessively long backstitches, as they can create bulkiness. A short, reinforced backstitch is generally sufficient. Practice using the reverse lever to become comfortable with the transition between forward and reverse sewing. This ensures a professional and long-lasting result for all your sewing projects.
Maintenance and Troubleshooting
Regular cleaning and lubrication are vital for optimal performance. This section details how to maintain your Brother LS-2125i and resolve common issues like thread jams.
Cleaning the Machine
Maintaining a clean sewing machine is crucial for its longevity and performance. Dust, lint, and stray threads can accumulate within the machine, causing malfunctions and affecting stitch quality. Before cleaning, always disconnect the power supply to prevent accidental operation.
Begin by removing the needle and presser foot. Use a small brush, often included with your LS-2125i, to gently remove lint from the bobbin area, feed dogs, and around the needle plate. A soft cloth lightly dampened with sewing machine oil can be used to wipe down exterior surfaces. Avoid using water or harsh cleaning agents, as these can damage internal components.
Pay particular attention to the bobbin case and surrounding areas, as lint tends to gather there. Regularly cleaning these areas will prevent thread jamming and ensure smooth operation. Inspect the feed dogs for any accumulated debris and remove it carefully. Remember to clean under the needle plate as well. Consistent cleaning will keep your Brother LS-2125i running smoothly for years to come.
Oil Points and Lubrication
Proper lubrication is essential for the smooth operation of your Brother LS-2125i sewing machine. While modern machines are often designed to be relatively self-lubricating, periodic oiling of key components extends their lifespan and prevents wear. Always use sewing machine oil specifically designed for this purpose; other oils can cause damage.
Refer to your instruction manual for specific oil points. Generally, these include the bobbin race, the hook assembly, and any areas where metal parts move against each other. Apply a small drop of oil to each point, and then operate the machine briefly to distribute the oil evenly. Avoid over-oiling, as excess oil can attract dust and lint.
Wipe away any excess oil with a clean cloth. Regular lubrication, combined with consistent cleaning, will ensure your LS-2125i continues to perform reliably. It’s recommended to oil the machine after every 8 hours of use, or as needed based on usage frequency.
Troubleshooting Common Issues
Encountering issues with your Brother LS-2125i is common, but many are easily resolved. Thread jamming is frequent; ensure proper threading, correct bobbin insertion, and use quality thread. Clean the bobbin area and feed dogs regularly to prevent lint buildup. Needle breakage often stems from using the wrong needle type for the fabric, incorrect threading, or pulling the fabric while sewing.
If the machine isn’t sewing, re-thread both the upper and lower threads, and verify the presser foot is down. Skipped stitches can indicate a dull or incorrect needle, or improper tension settings. Always consult the manual for tension adjustment guidance. Uneven stitching might be caused by inconsistent fabric feeding; check the feed dogs for obstructions.
Regular maintenance prevents many problems. If issues persist, consult a qualified sewing machine technician.
Thread Jamming Solutions
Thread jamming on your Brother LS-2125i is often caused by improper threading or lint accumulation. First, stop the machine and lift the presser foot. Gently remove the jammed thread, avoiding forceful pulling which can damage components. Re-thread the upper thread, ensuring it’s correctly seated in the tension discs and guides.
Next, check the bobbin area. Remove the bobbin case and clean away any lint or thread fragments. Re-insert the bobbin, ensuring it unwinds smoothly in the correct direction. Verify the bobbin case is properly seated. Use high-quality thread and ensure it’s compatible with your fabric.
Regular cleaning of the machine, particularly the bobbin area and feed dogs, prevents lint buildup. If jamming persists, try a different needle. Always refer to the manual for detailed threading diagrams and maintenance instructions.
Needle Breakage Prevention
Needle breakage on your Brother LS-2125i can be frustrating, but is often preventable. Always use the correct needle type and size for your fabric. Lightweight fabrics require finer needles, while heavier fabrics need stronger ones. Ensure the needle is fully inserted into the needle clamp and securely tightened.
Avoid sewing over pins, as this can bend or break the needle. If you must sew near pins, slow down and use a pin positioning tool. Never pull the fabric while sewing; let the feed dogs do the work. Check the needle for damage – a bent or dull needle should be replaced immediately.
Proper threading is crucial; ensure the thread is correctly seated in the needle eye. Regularly clean the machine to remove lint and debris that can interfere with needle movement; Refer to your manual for specific needle recommendations and threading instructions.
Parts and Accessories
Genuine Brother parts, like the presser foot holder screw (132730-122) and replacement presser foot (138135-122), are available through authorized dealers for your LS-2125i.
Presser Foot Holder Screw (Part Code: 132730-122)
The presser foot holder screw, identified by part code 132730-122, is a crucial component for securing the presser foot to your Brother LS-2125i sewing machine. This small but vital screw ensures the presser foot remains firmly in place during operation, maintaining consistent fabric feeding and stitch quality.
If the original screw is lost or damaged, it’s essential to replace it with the correct part to avoid issues with stitch formation or fabric handling. Attempting to use an incorrect screw size or type could potentially damage the machine or compromise its performance.
This specific part is readily available through authorized Brother dealers. Contacting a dealer directly guarantees you receive a genuine Brother replacement, ensuring compatibility and reliability. When ordering, always specify the part code (132730-122) to ensure the correct item is shipped to you. Proper installation is key; consult your LS-2125i instruction manual for guidance.
Replacement Presser Foot (Part Number: 138135-122)
The standard presser foot, designated by part number 138135-122, is a fundamental accessory for your Brother LS-2125i sewing machine. This foot is used for a wide range of general sewing applications, providing consistent pressure to the fabric as it’s fed through the machine.
Over time, or with heavy use, the original presser foot may become worn, damaged, or lost. A replacement ensures continued optimal sewing performance. Using a damaged foot can lead to skipped stitches, uneven fabric feeding, or even damage to the fabric itself.
Genuine Brother replacement presser feet, identified by part number 138135-122, are available for purchase through authorized Brother dealers. These dealers can guarantee compatibility and quality. Always verify the part number when ordering to ensure you receive the correct replacement for your LS-2125i model. Refer to your machine’s manual for proper installation instructions.
Safety Precautions
Prior to operating your Brother LS-2125i, carefully review these essential safety precautions. Always disconnect the power supply when changing the needle, threading, or performing any maintenance. Never operate the machine with a damaged cord or plug. Keep fingers away from moving parts, particularly the needle and presser foot, to prevent injury.
Exercise caution when sewing delicate fabrics, as the machine can quickly pull the material. Avoid sewing over pins, as this can cause the needle to break and potentially cause injury. Always use the appropriate needle type and size for the fabric being sewn.
This sewing machine is not intended for use by children without adult supervision. Store the machine in a safe, dry location, out of reach of children. Refer to the complete instruction manual for a comprehensive list of safety guidelines and warnings to ensure safe and enjoyable operation of your LS-2125i.